 RiftSight
Set up RiftSight
One extension does all three. Pick where to start; you can add the others any time.
Play: the deck tracker
-
Install RiftSight
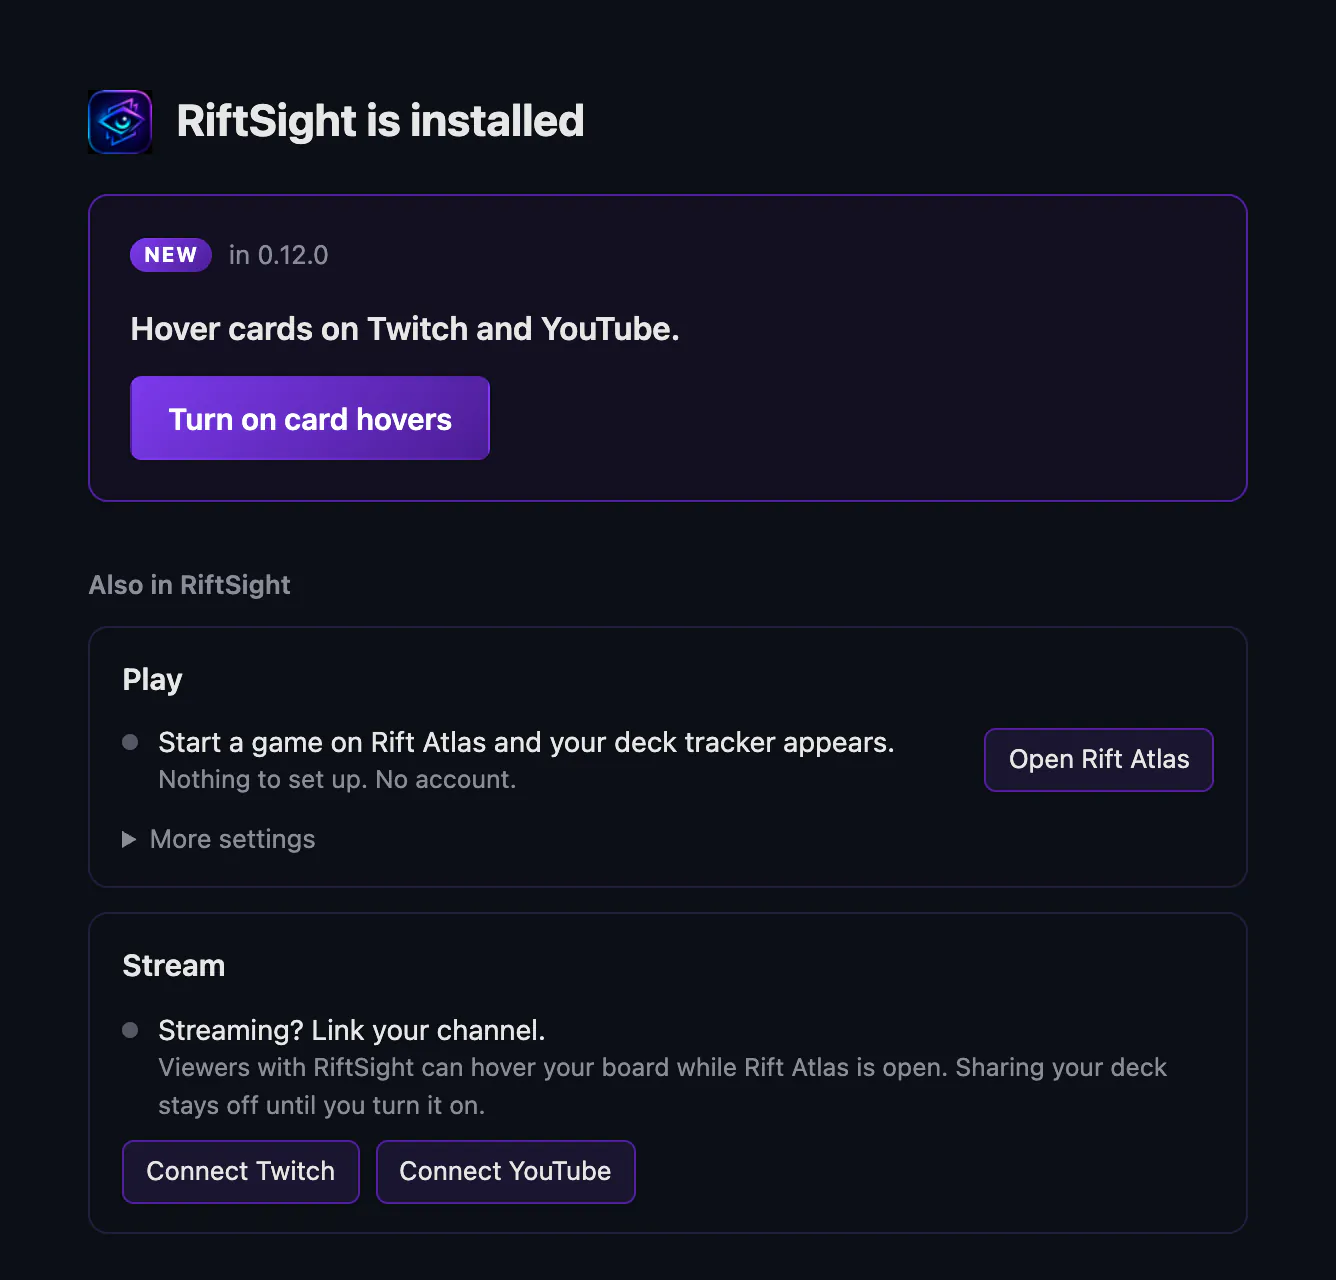
Add RiftSight from the Chrome Web Store. A tab opens that says RiftSight is installed: for the deck tracker there is nothing to choose and nothing to set up (its Play card sits under Also in RiftSight). Tip: pin its icon so it is one click away (Chrome's Extensions menu, the puzzle icon, then the pin next to RiftSight).
RiftSight installs in Chrome, Edge or Brave on a computer.
How you know it workedThe RiftSight is installed tab opens, and its Play card reads Start a game on Rift Atlas and your deck tracker appears.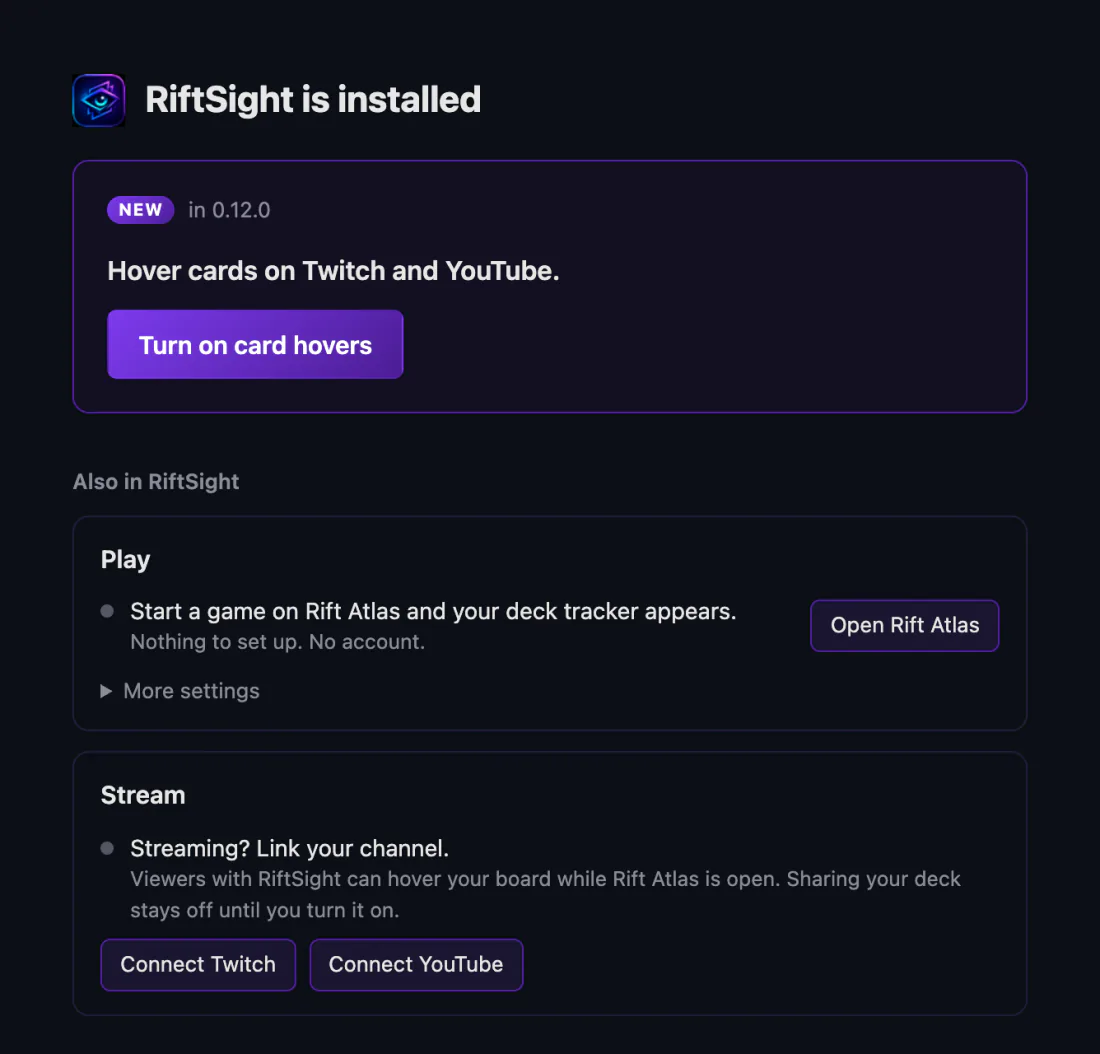 (full size, opens in a new tab)
 -
Open Rift Atlas and start a game
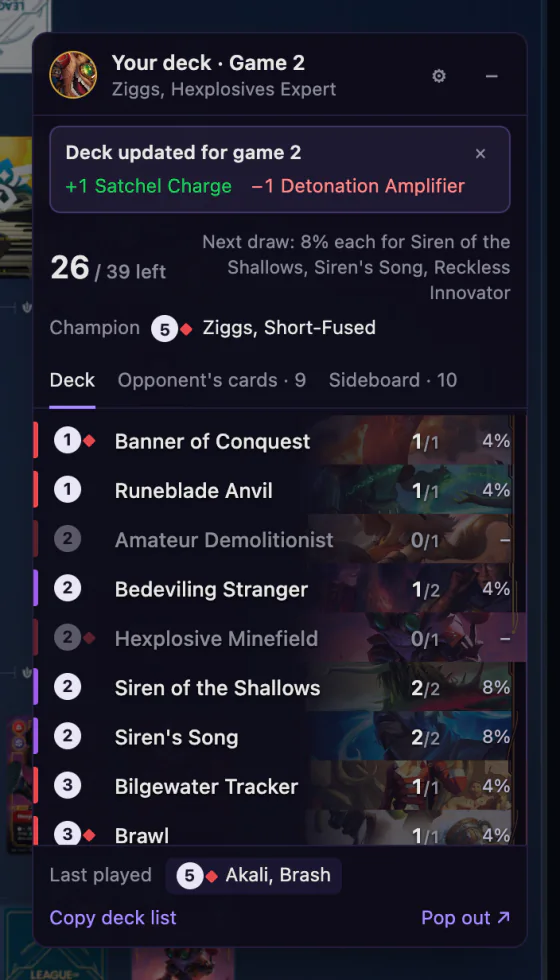
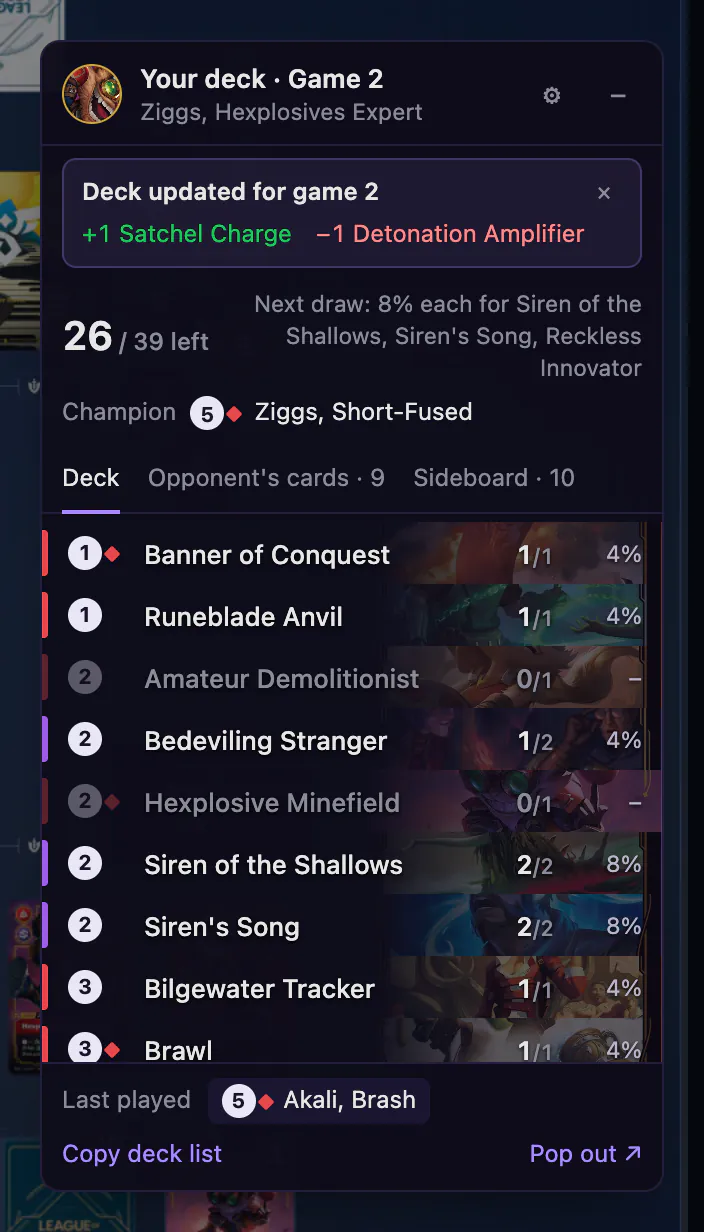
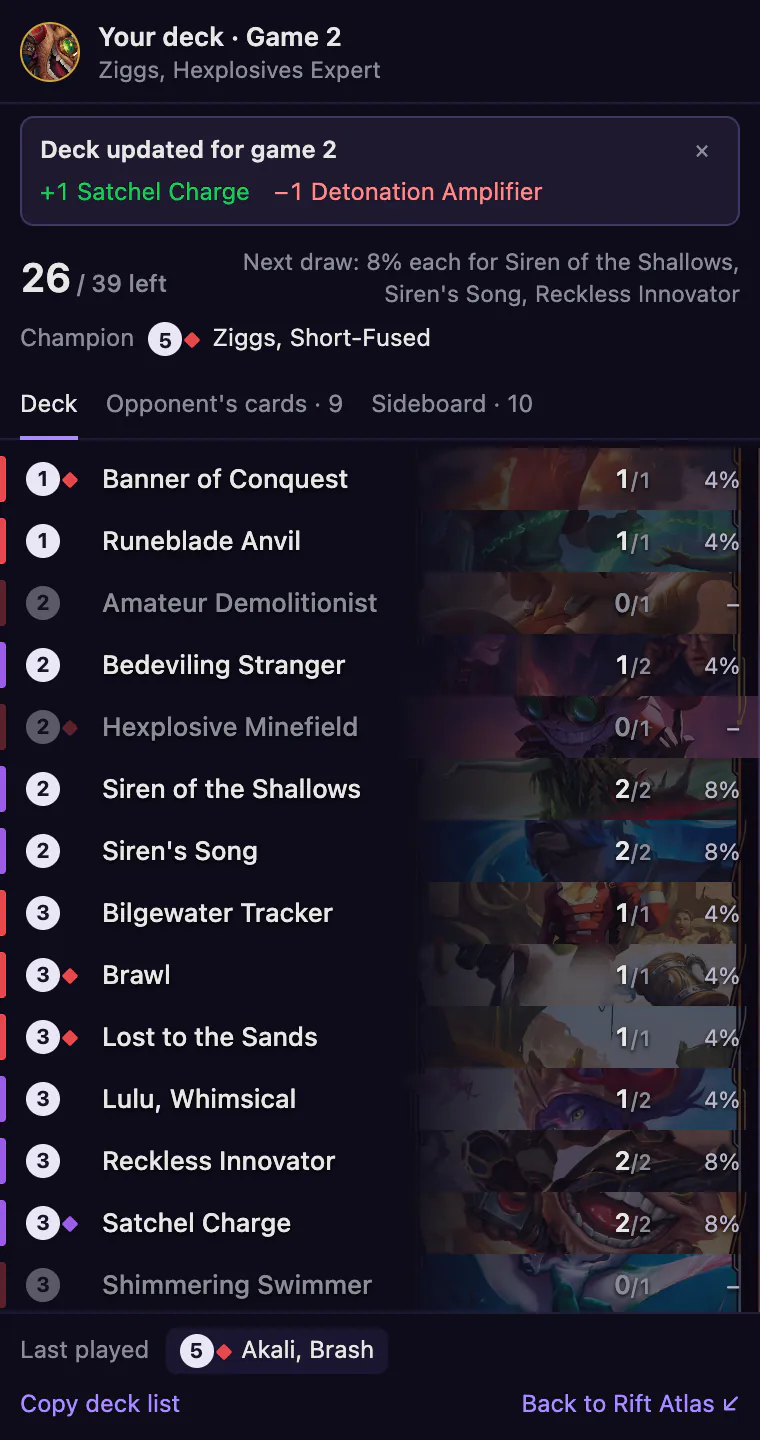
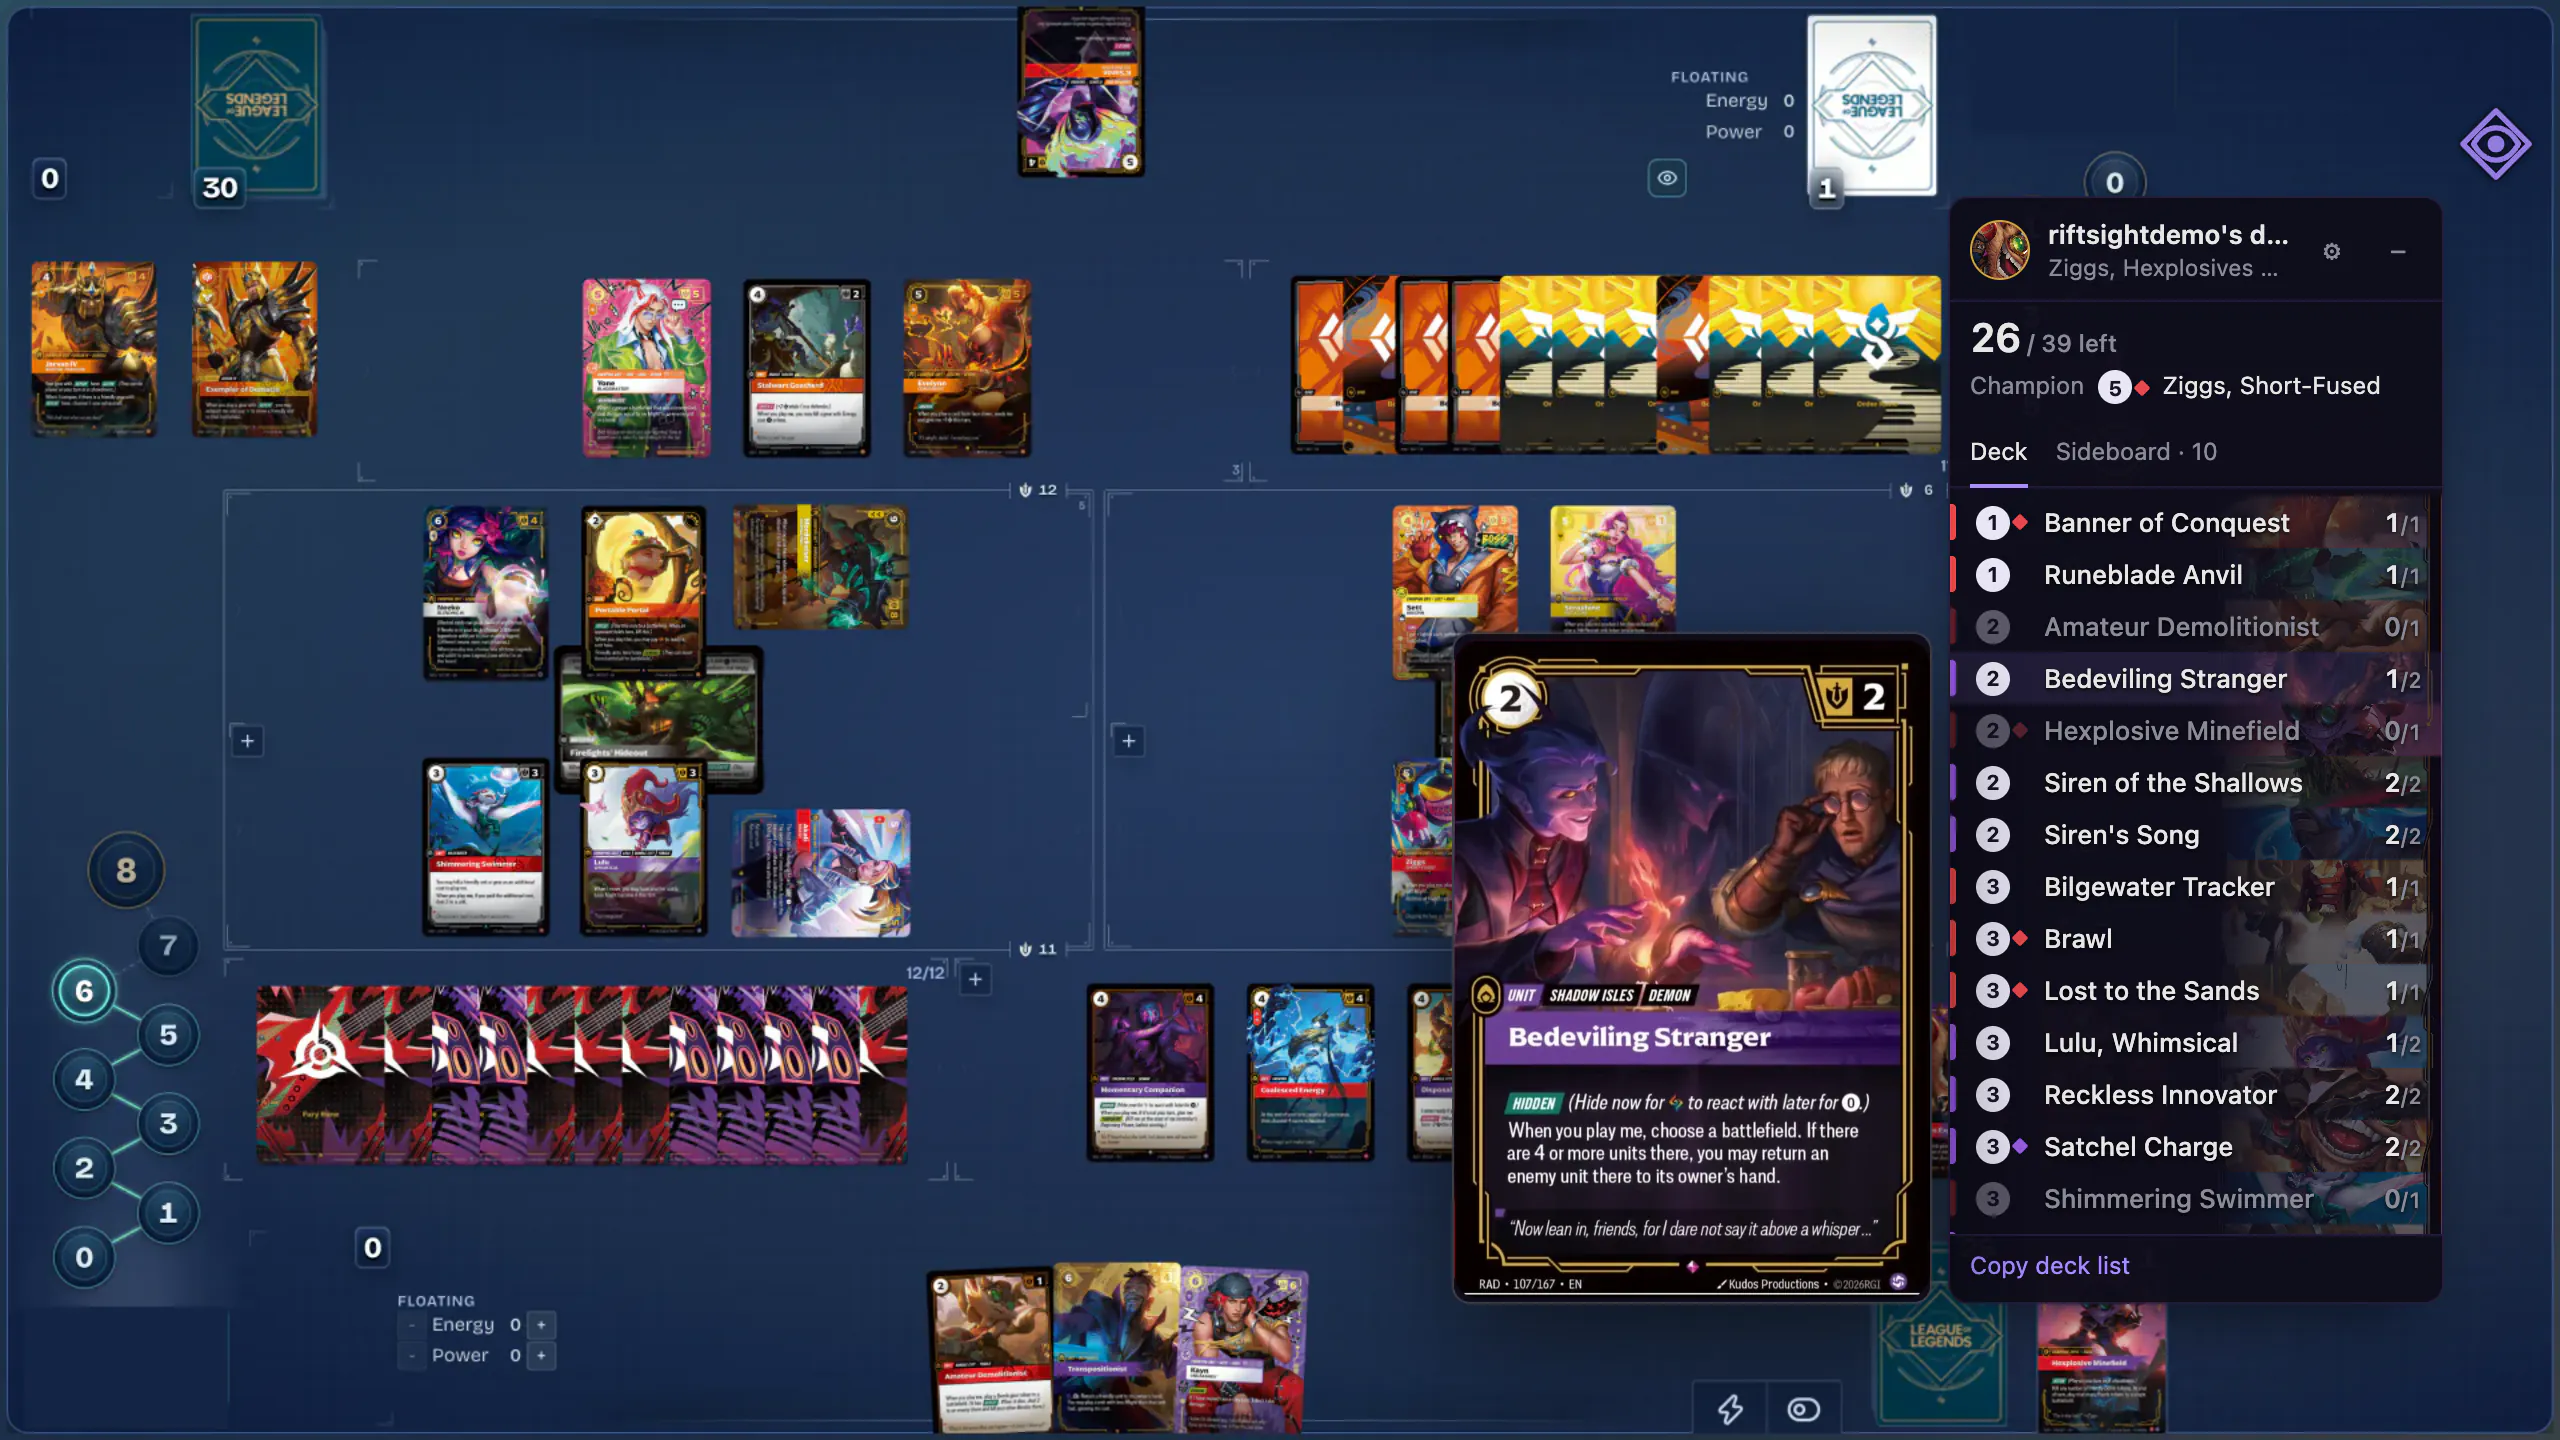
Any game works, a Solo Room included. The deck tracker appears in the Rift Atlas page and follows your deck: cards left on each row, your odds for the next draw, your champion, and the cards your opponent has revealed.
How you know it workedThe tracker shows "N / 39 left" and counts down as you draw.Was Rift Atlas open before you installed RiftSight? Reload that tab once.
 (full size, opens in a new tab)
 -
Make it yours
-
In the popup
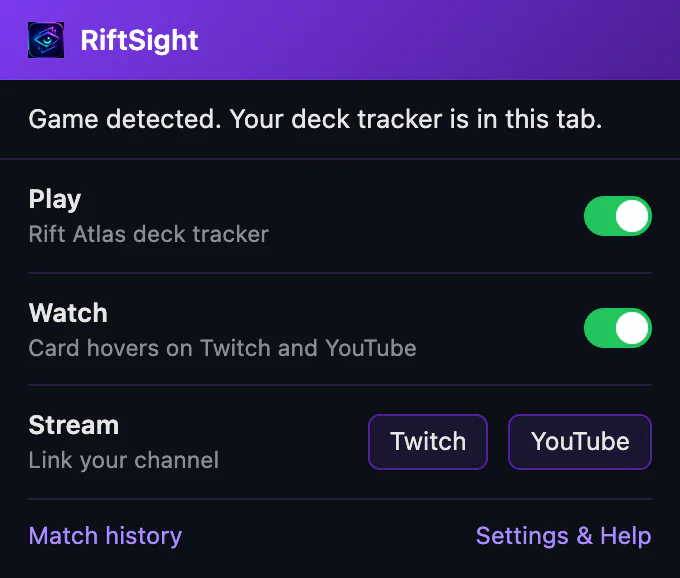
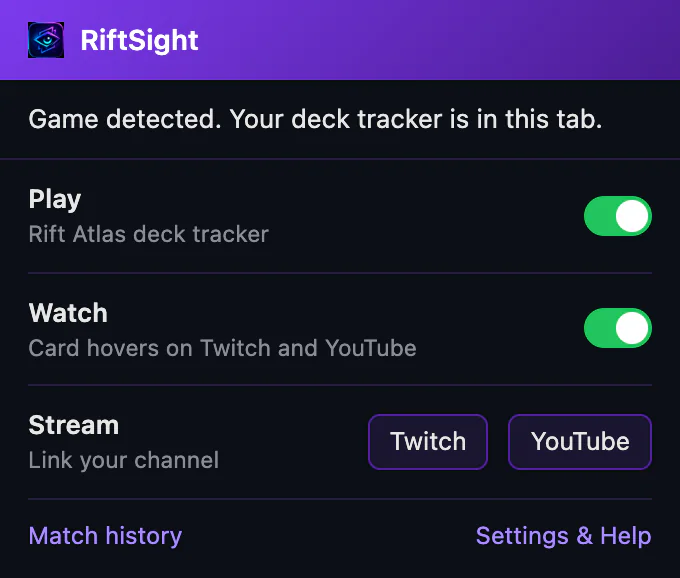
Click the RiftSight icon. On the Rift Atlas tab the top line reads Game detected. Your deck tracker is in this tab. The Play switch turns the deck tracker on or off. Match history, at the foot, opens your games, kept on your device, with the result, both legends and a game log; export or delete any match. Match history is off until you turn on Save match history in RiftSight Settings & Help, in the Deck tracker section. It starts with your next game.
 (full size, opens in a new tab)
 -
Tracker settings
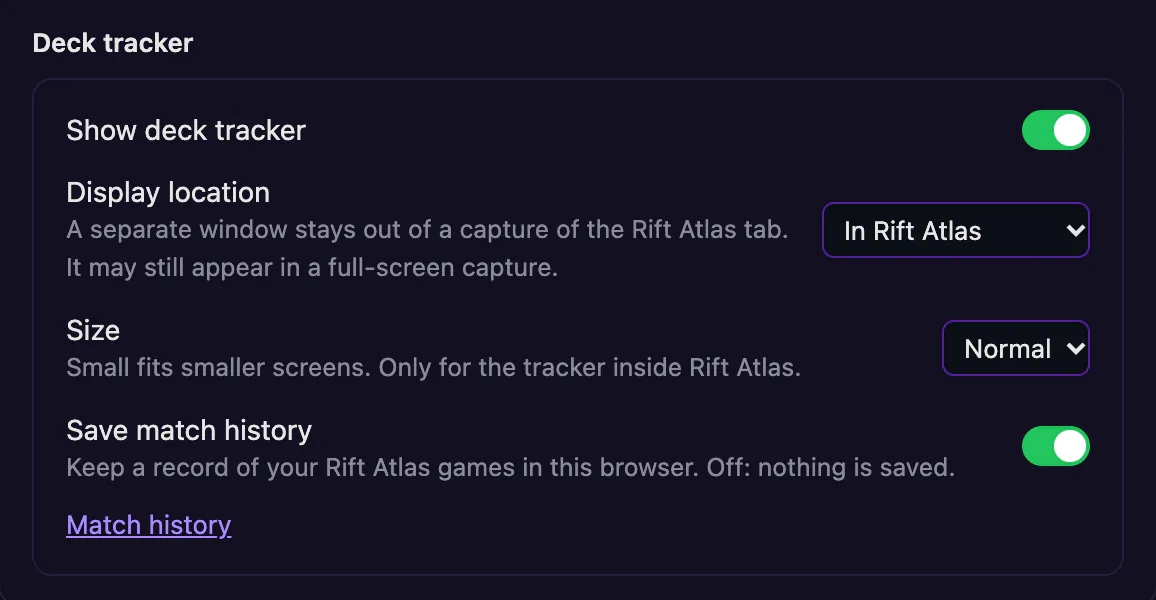
Settings & Help, at the foot of the popup, opens RiftSight Settings & Help. Open More settings in its Play card for the Deck tracker section: the Display location (in the Rift Atlas page, or a separate window), the Size and Save match history. The tracker's own ⚙ holds the Tracker size, Normal or Small.
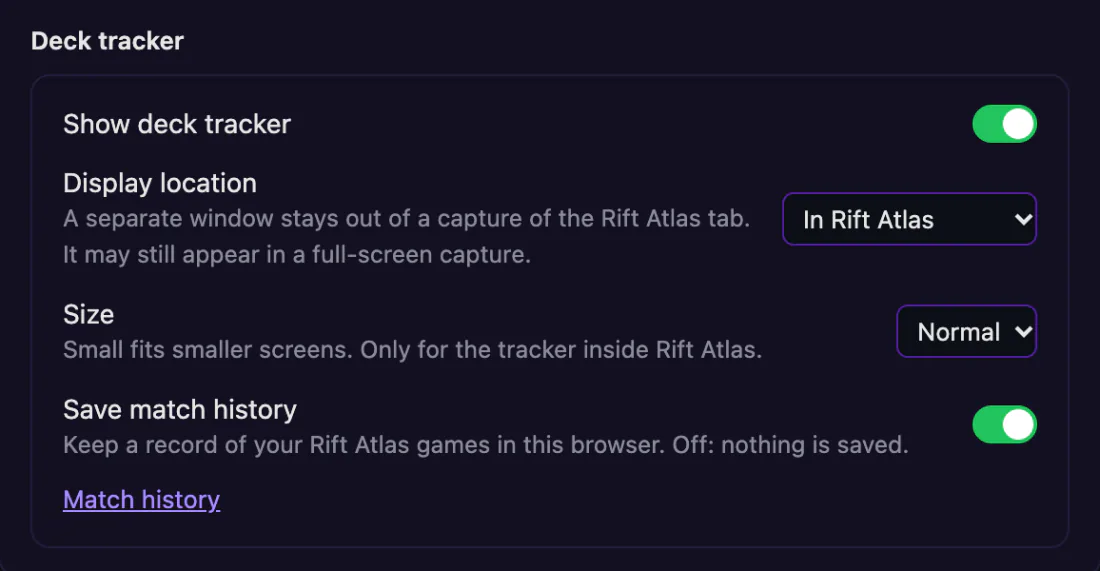 (full size, opens in a new tab)
 -
Small size
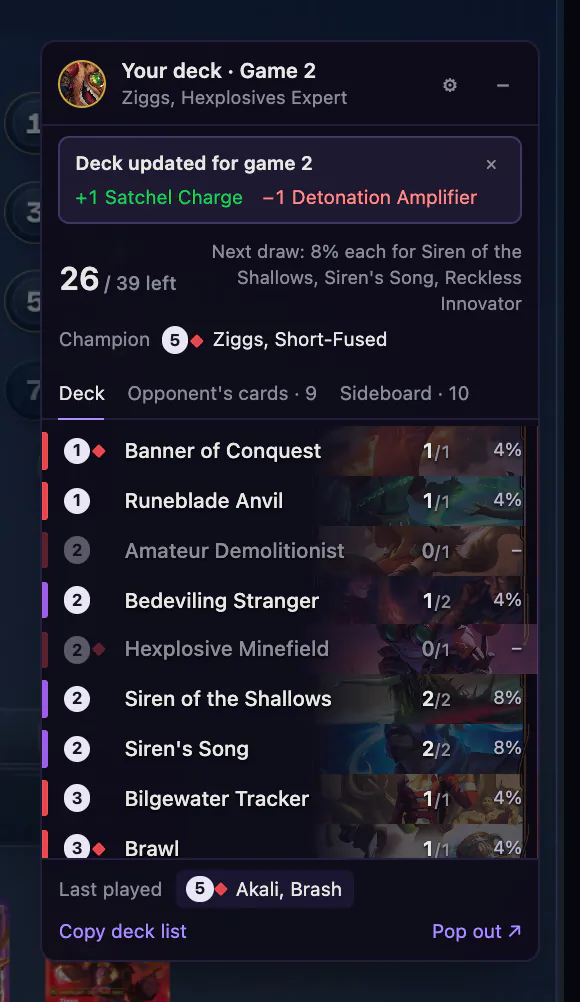
For smaller screens. In either size, drag the tracker by its header, or collapse it to a pill.
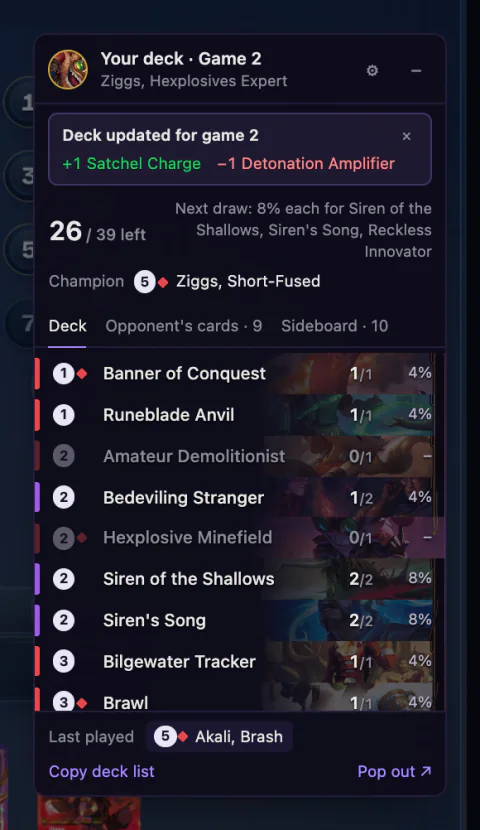 (full size, opens in a new tab)
 -
In a separate window
Pop out ↗, at the foot of the tracker, moves it to its own window (so does the Display location setting). The window stays out of a capture of the Rift Atlas tab (a full-screen capture still shows it). Back to Rift Atlas ↙ returns it to the page; if you close the window, the popup's Open tracker window brings it back.
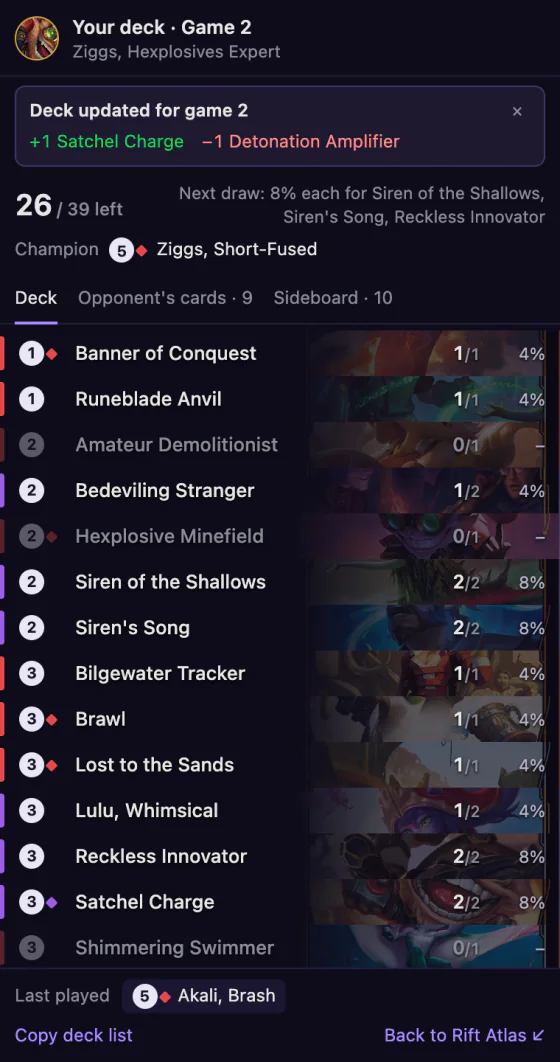 (full size, opens in a new tab)
In a best of three, the tracker shows the game number and a "Deck updated" note after you sideboard.
-
Watch: hover cards in videos and streams
-
Install RiftSight and turn on Watch
Add RiftSight from the Chrome Web Store. The tab that opens, RiftSight is installed, leads with Turn on card hovers: click it, and Chrome asks once, for Twitch and YouTube together. No RiftSight account needed.
RiftSight installs in Chrome, Edge or Brave on a computer.
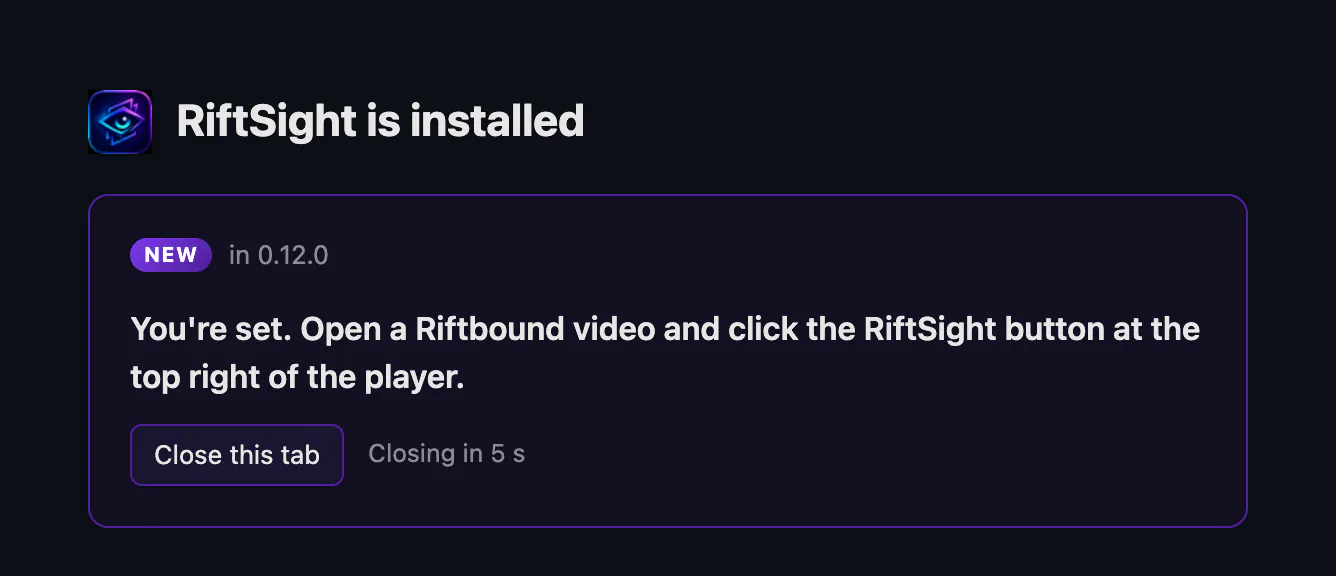
When the tab reads You're set., you're done: it closes itself after a few seconds, or click Close this tab. Closed it early or said no to Chrome? The same switch is Watch in the RiftSight popup. Tip: pin its icon so it is one click away.
How you know it workedThe tab reads You're set. Open a Riftbound video and click the RiftSight button at the top right of the player., and the popup's Watch row reads Card hovers on Twitch and YouTube.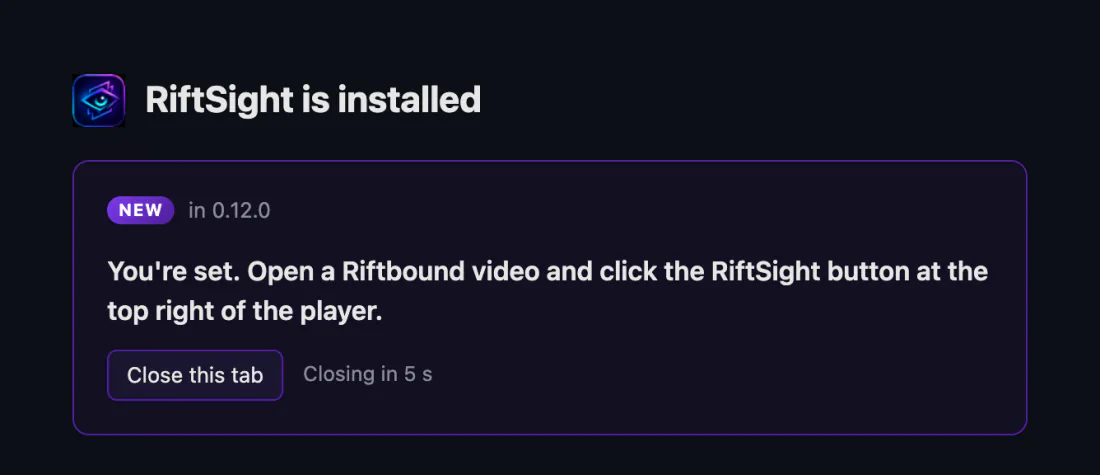 (full size, opens in a new tab)
 -
Watch and hover
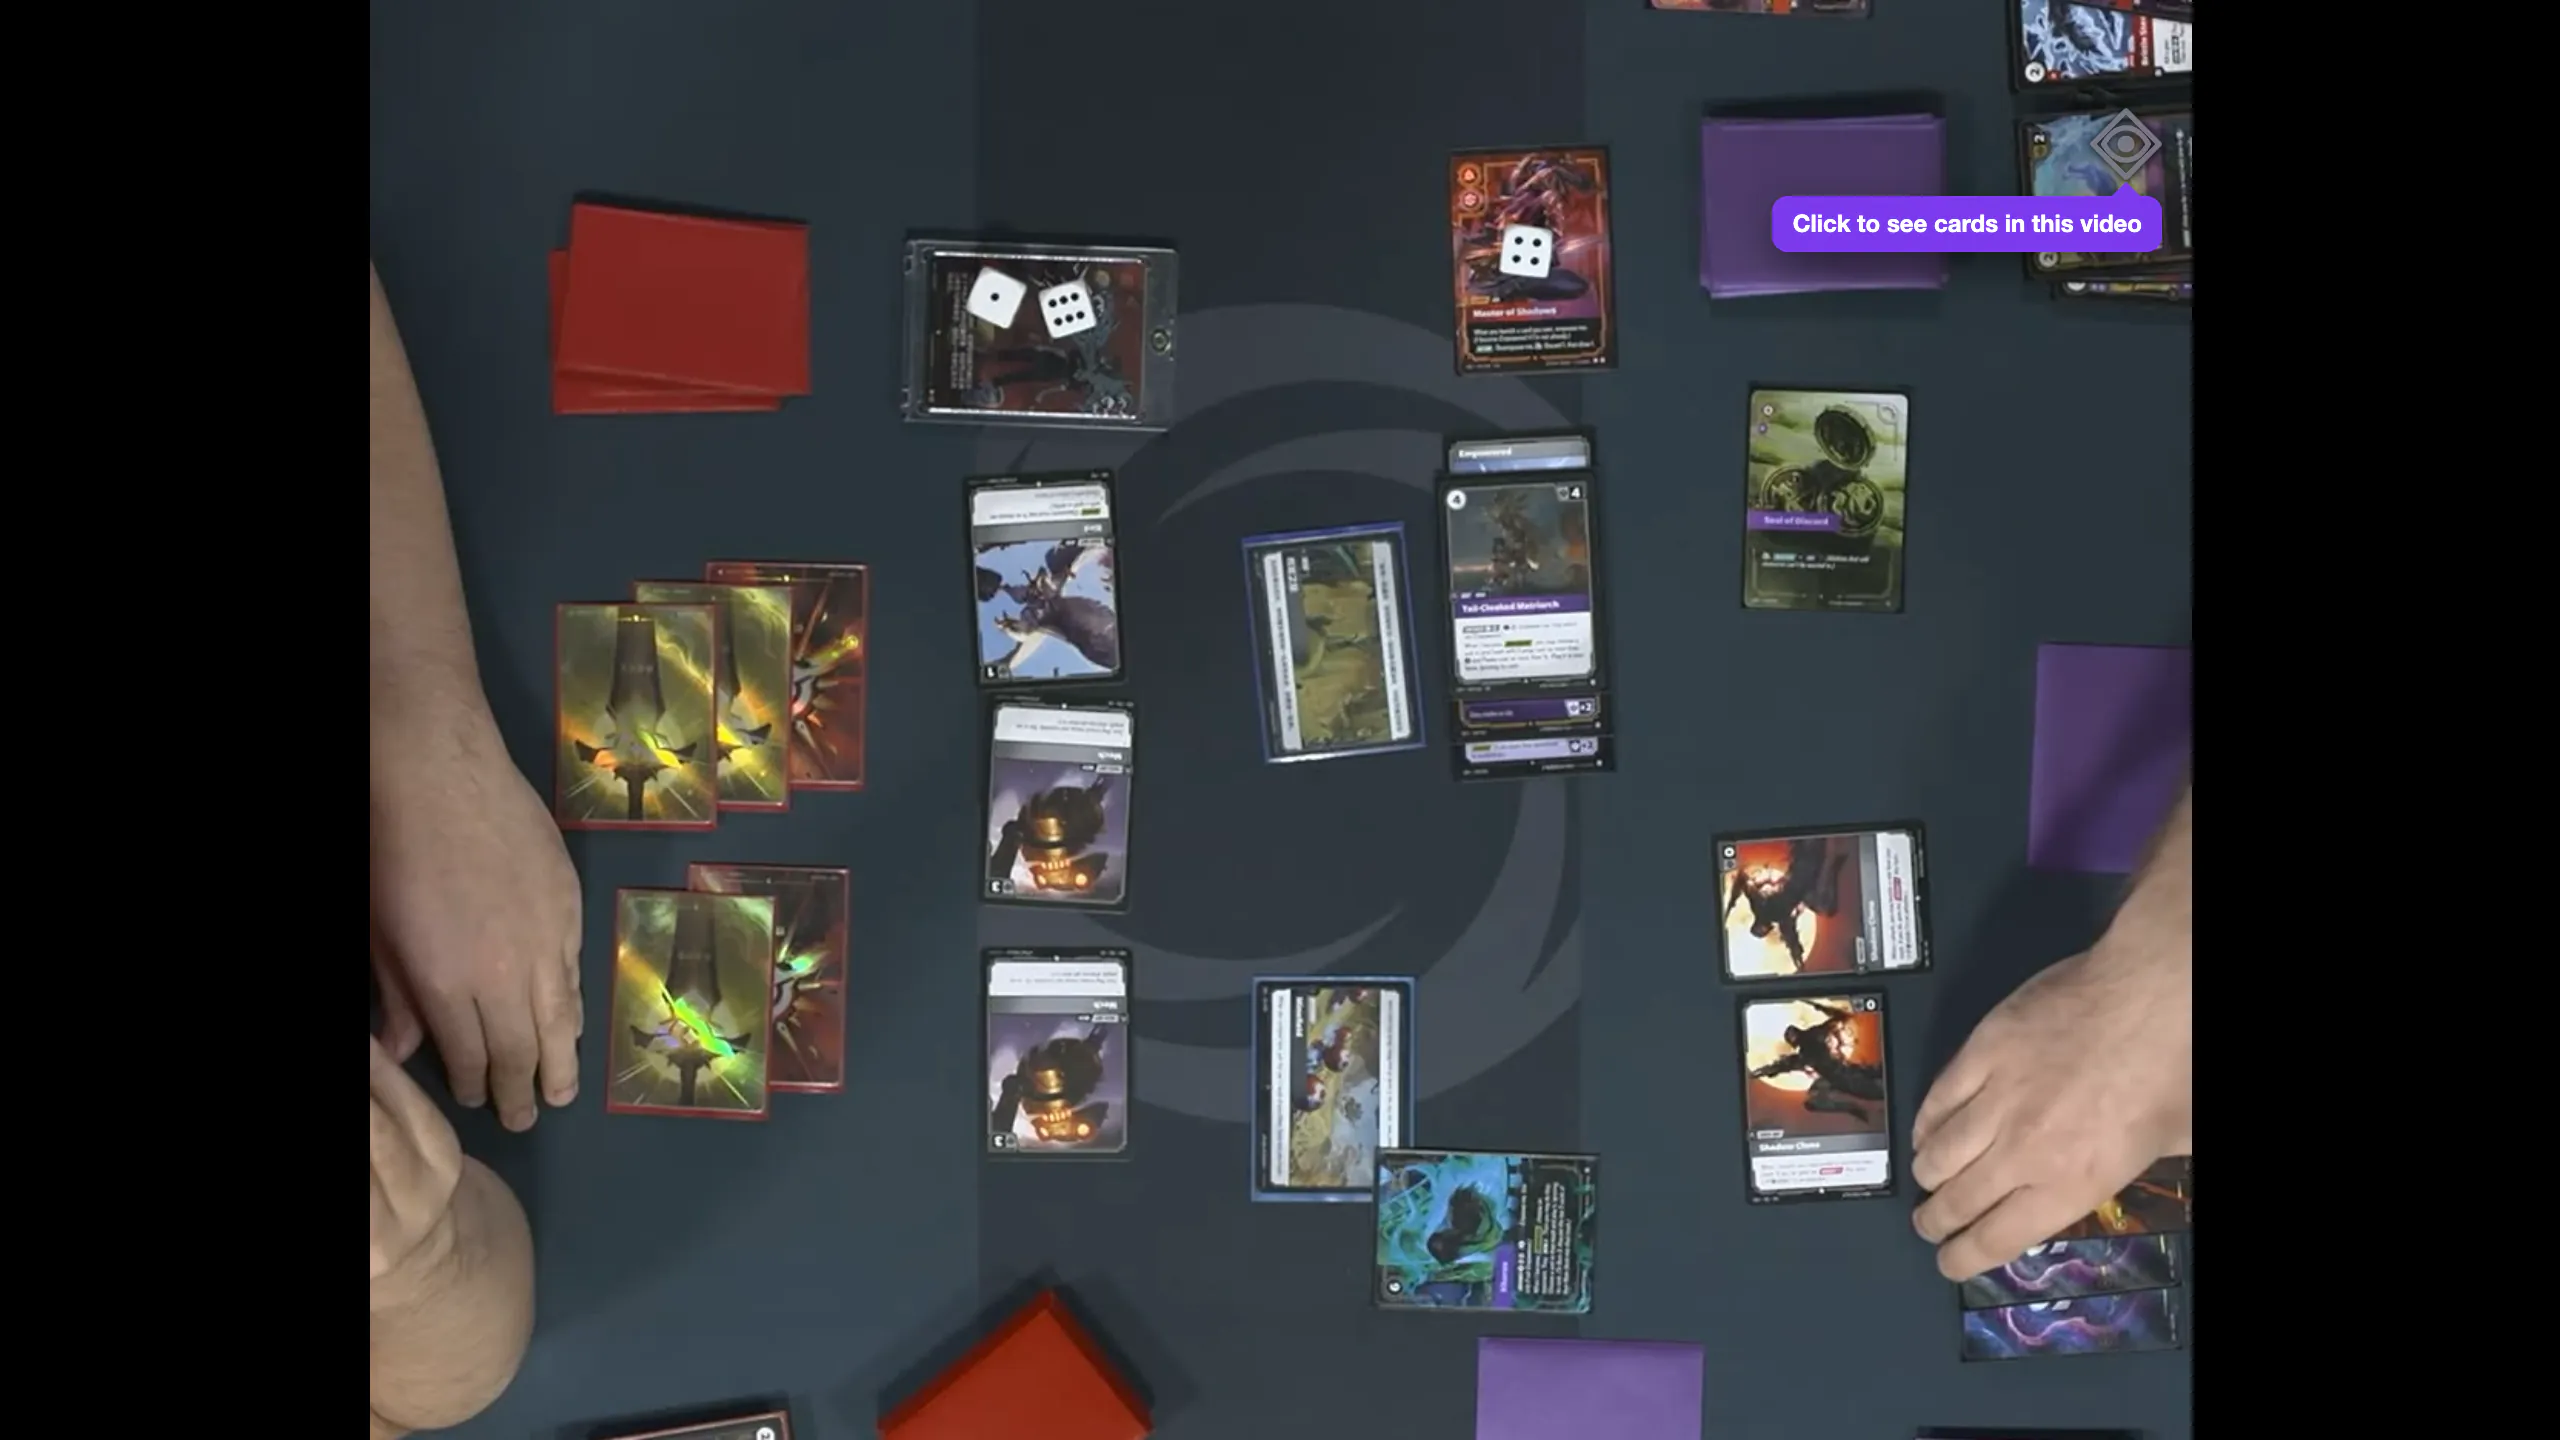
Open a YouTube video, or a twitch.tv stream or video, showing a game on Rift Atlas or TCG Arena, or physical play. Click the RiftSight button at the top right of the picture once (what it looks like; the first time, it may say Click to see cards in this video), then rest the pointer on a card to see it full size. RiftSight remembers your choice for that video, or for that twitch.tv channel. When RiftSight isn't sure what a card is, it shows nothing.
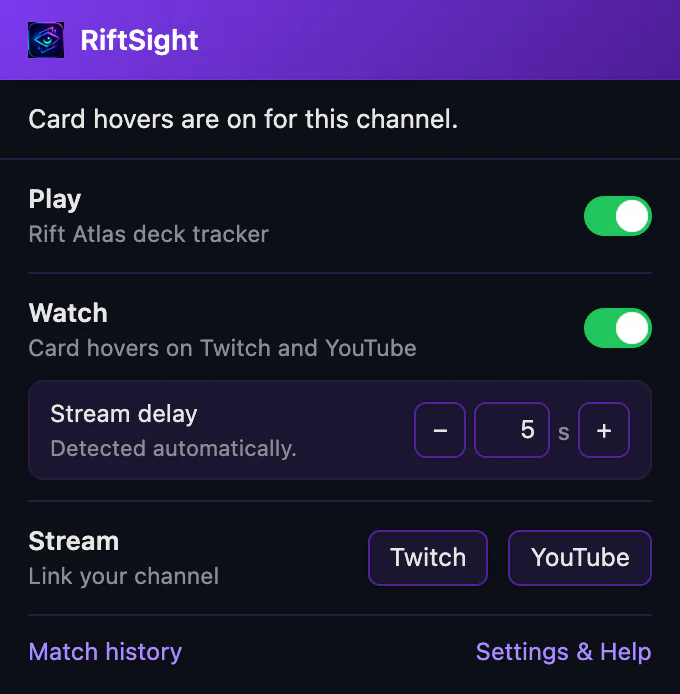
On a live stream that uses RiftSight, card hovers come from the streamer's game and are already on. Give it a few seconds after the stream loads: RiftSight measures your delay behind the broadcast and waits it out, so the card you hover matches the picture.
How you know it workedPointing at a face-up card shows the full card beside it, and the popup's top line reads Card hovers are on for this video (or for this channel).
-
Already on a stream? Try it on this tab
-
Try on this tab
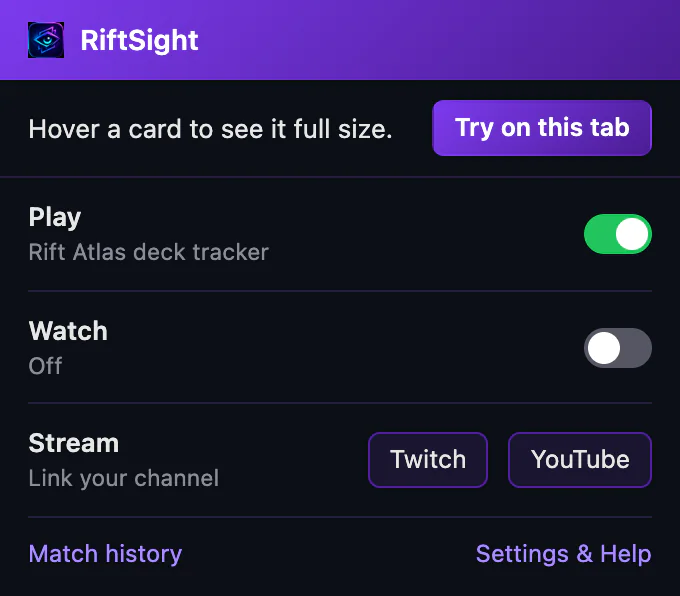
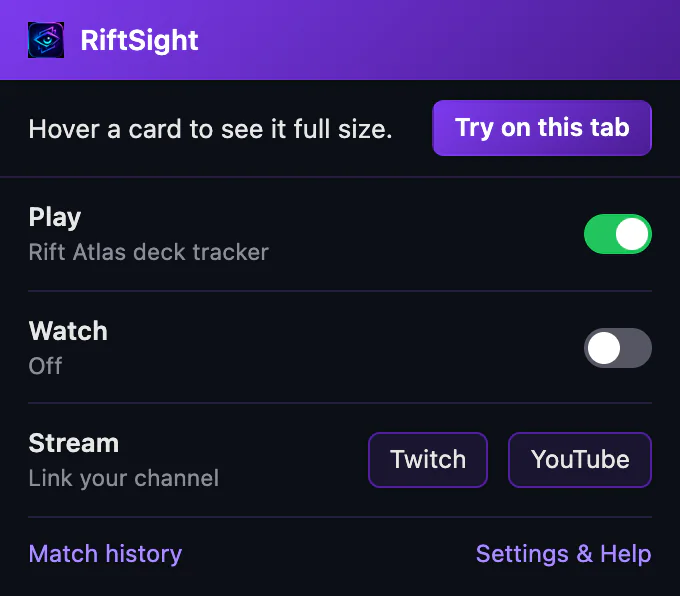
On a twitch.tv or YouTube page, click the RiftSight icon. Not pinned? Open Chrome's Extensions menu (the puzzle icon) and click RiftSight. The popup offers Try on this tab: it closes once cards can be hovered, and card hovers work on that tab until you reload it, with no Chrome prompt.
 (full size, opens in a new tab)
 -
Keep it on
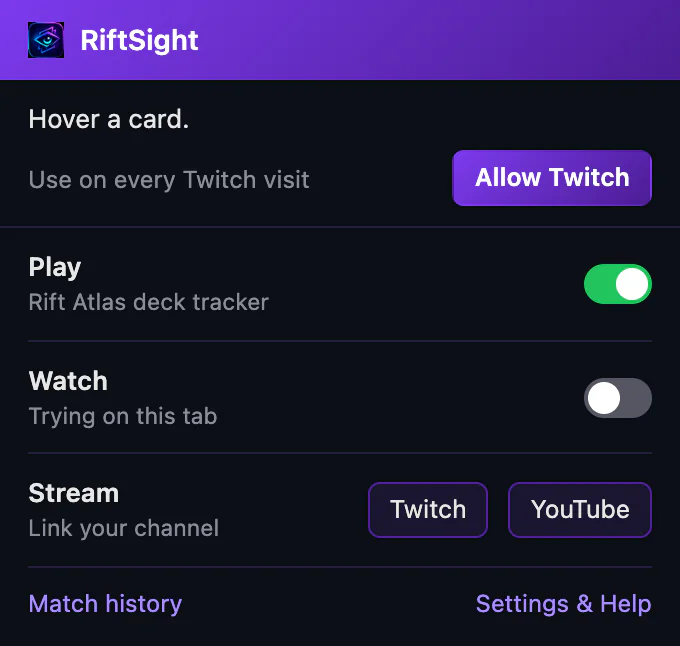
Open the popup again after a Try: it offers Allow Twitch (or Allow YouTube) beside Use on every Twitch visit. Chrome asks once, for that site. Until then, if neither site is allowed yet, the Watch row reads Trying on this tab.
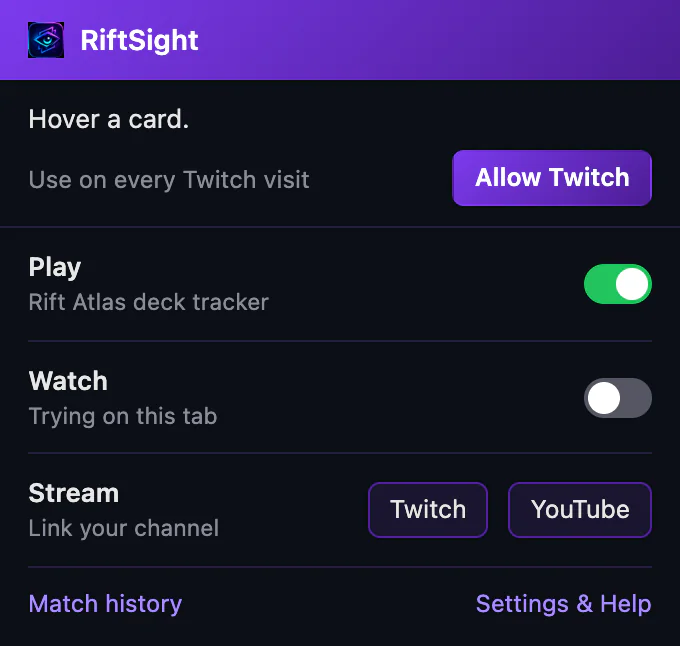 (full size, opens in a new tab)
-
-
On the video
-
Deck
Opens the streamer's deck when they share it: cards left out of the list's copies, their champion and sideboard. Hover a row for the card or copy the list. From the panel's ⚙, pick a Deck size, Normal or Small, or Hide for this channel.
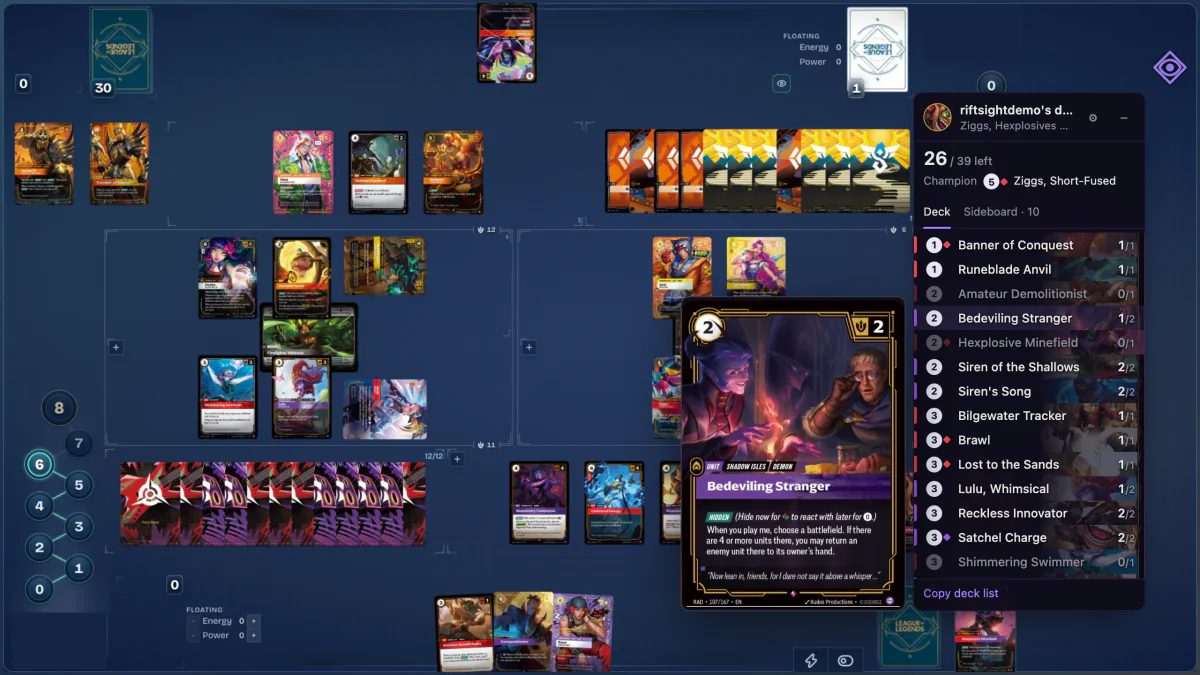 (full size, opens in a new tab)
 -
First time on a video
On a video whose streamer doesn't use RiftSight, the RiftSight button may say Click to see cards in this video the first time. One click turns card hovers on for that video (on twitch.tv, that channel); after that, rest the pointer on a card.
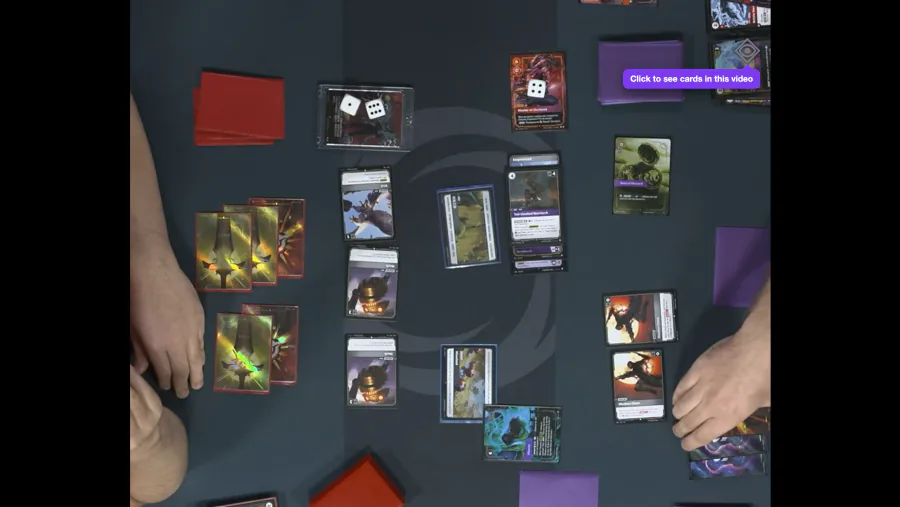 (full size, opens in a new tab)
 -
The RiftSight button
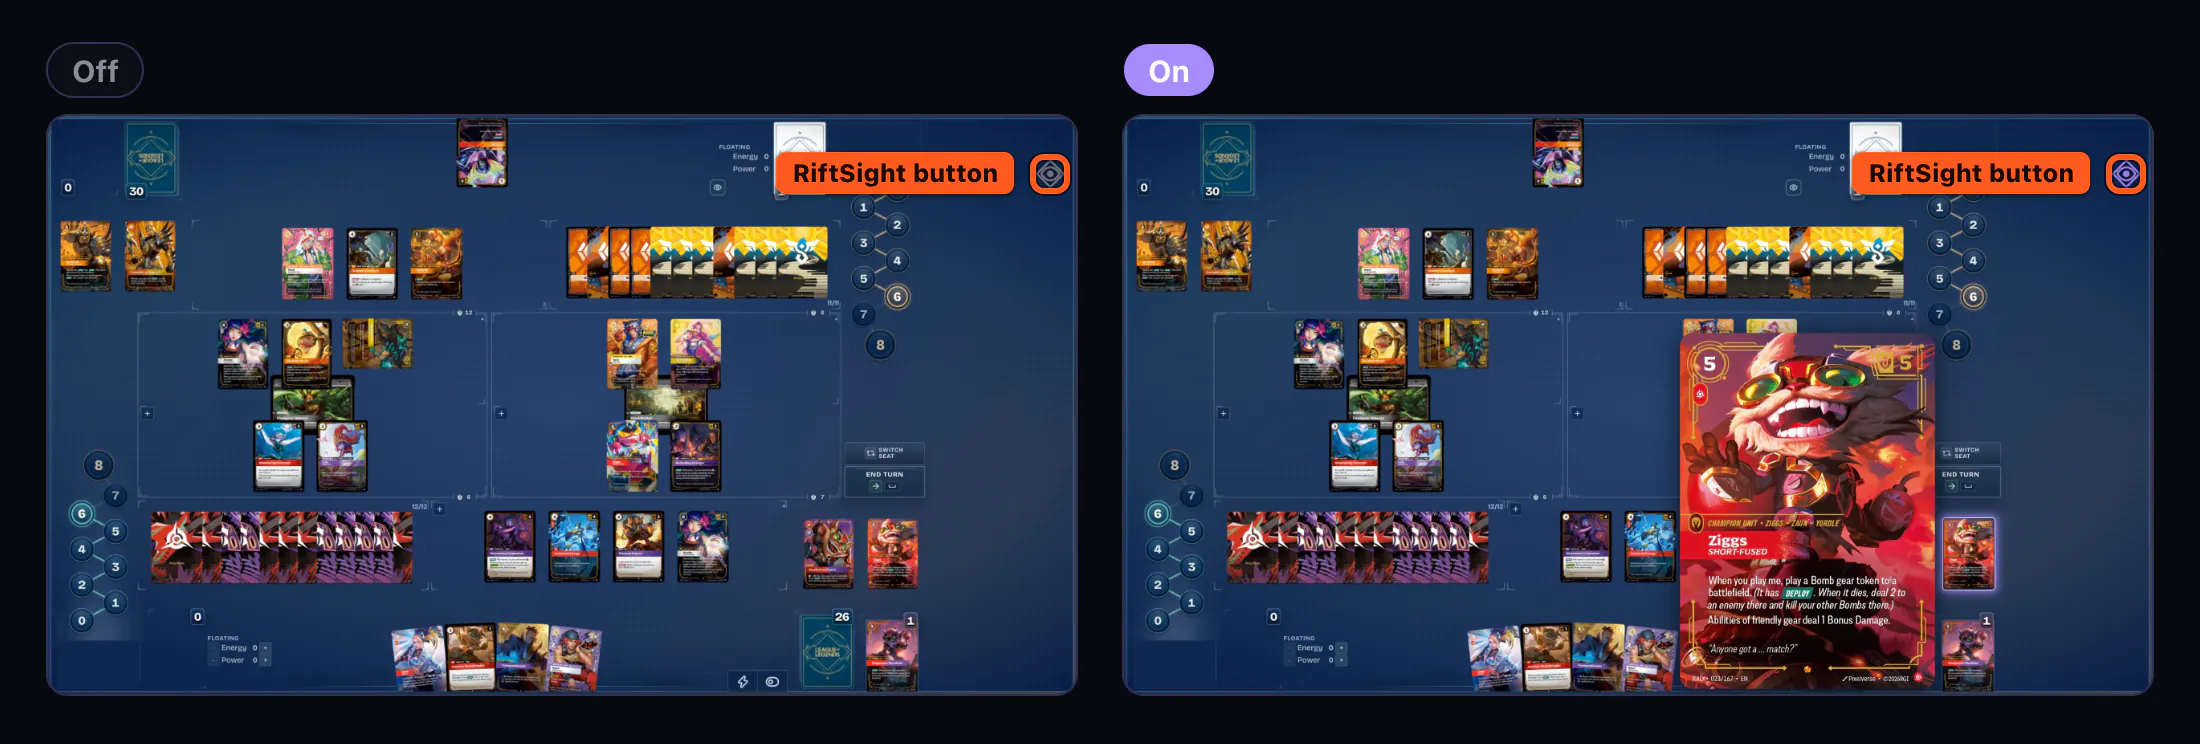
An eye in a diamond, at the picture's top right while your pointer is over the video. One click turns card hovers on or off: on a stream that uses RiftSight they start on, on other videos they start off. RiftSight remembers your choice for each video or channel. While they are off on a video, the popup reads Card hovers are off for this video and points you to the button; on a stream that uses RiftSight it reads Card hovers are off for this channel, with Turn on.
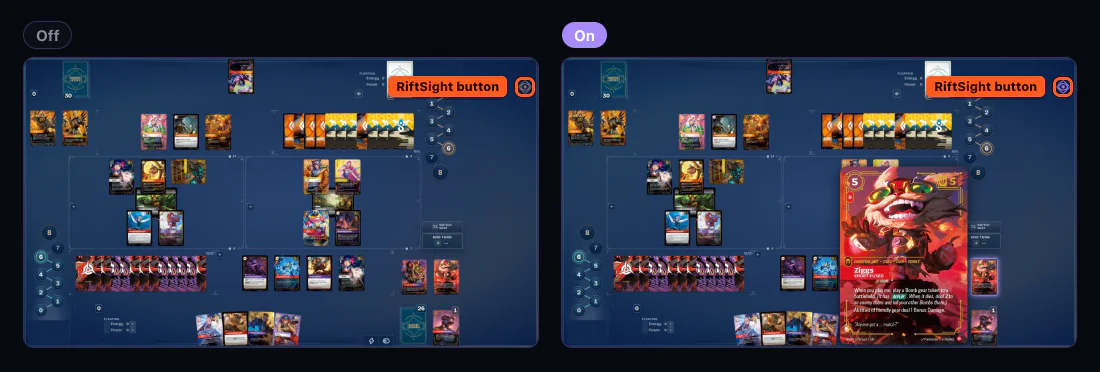 (full size, opens in a new tab)
 -
Stream delay
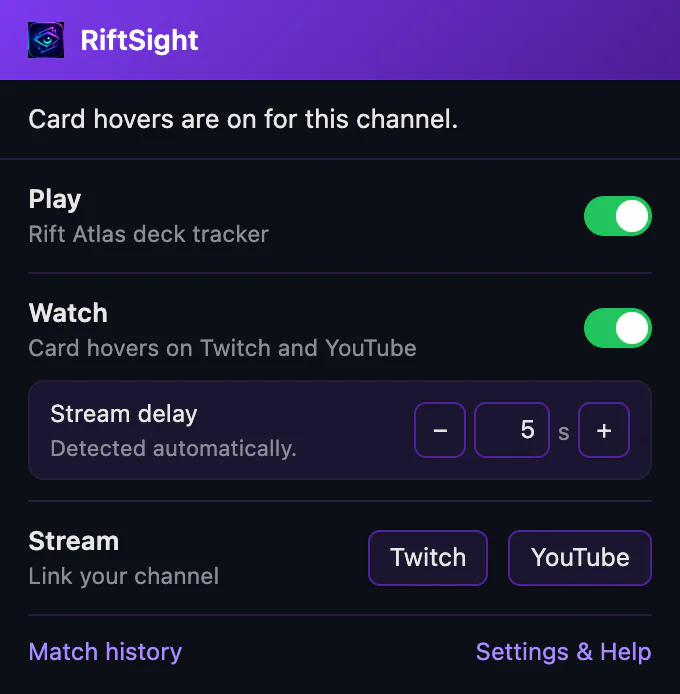
On a stream that uses RiftSight, the popup shows Stream delay: Detected automatically. when RiftSight measured how far behind the broadcast you are, or Estimated. Adjust if needed. when it couldn't. If cards don't line up with the video, use − and + or type the seconds; it then reads Set by you., and Use automatic goes back.
 (full size, opens in a new tab)
-
-
Viewer settings
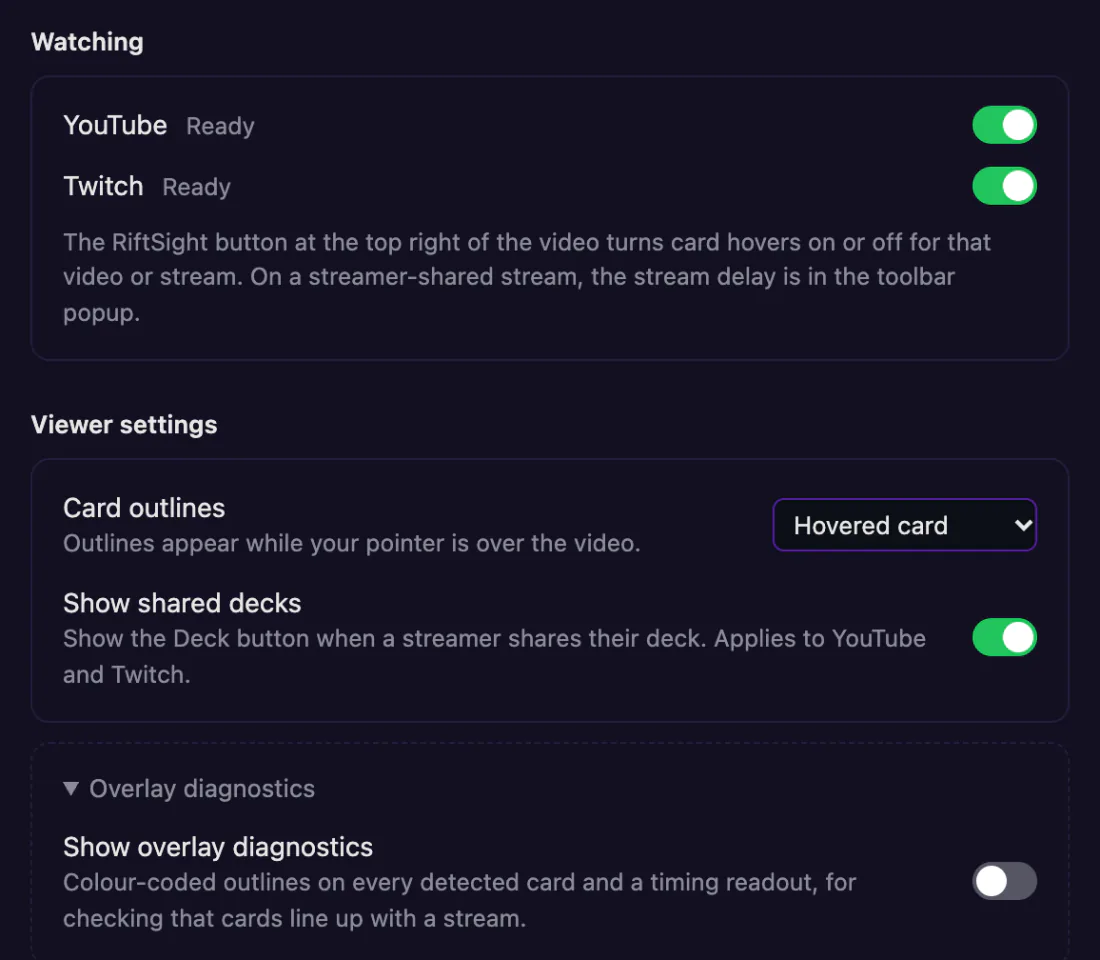
One set for twitch.tv and YouTube, in RiftSight Settings & Help (the popup's Settings & Help link), under More settings in the Watch card:
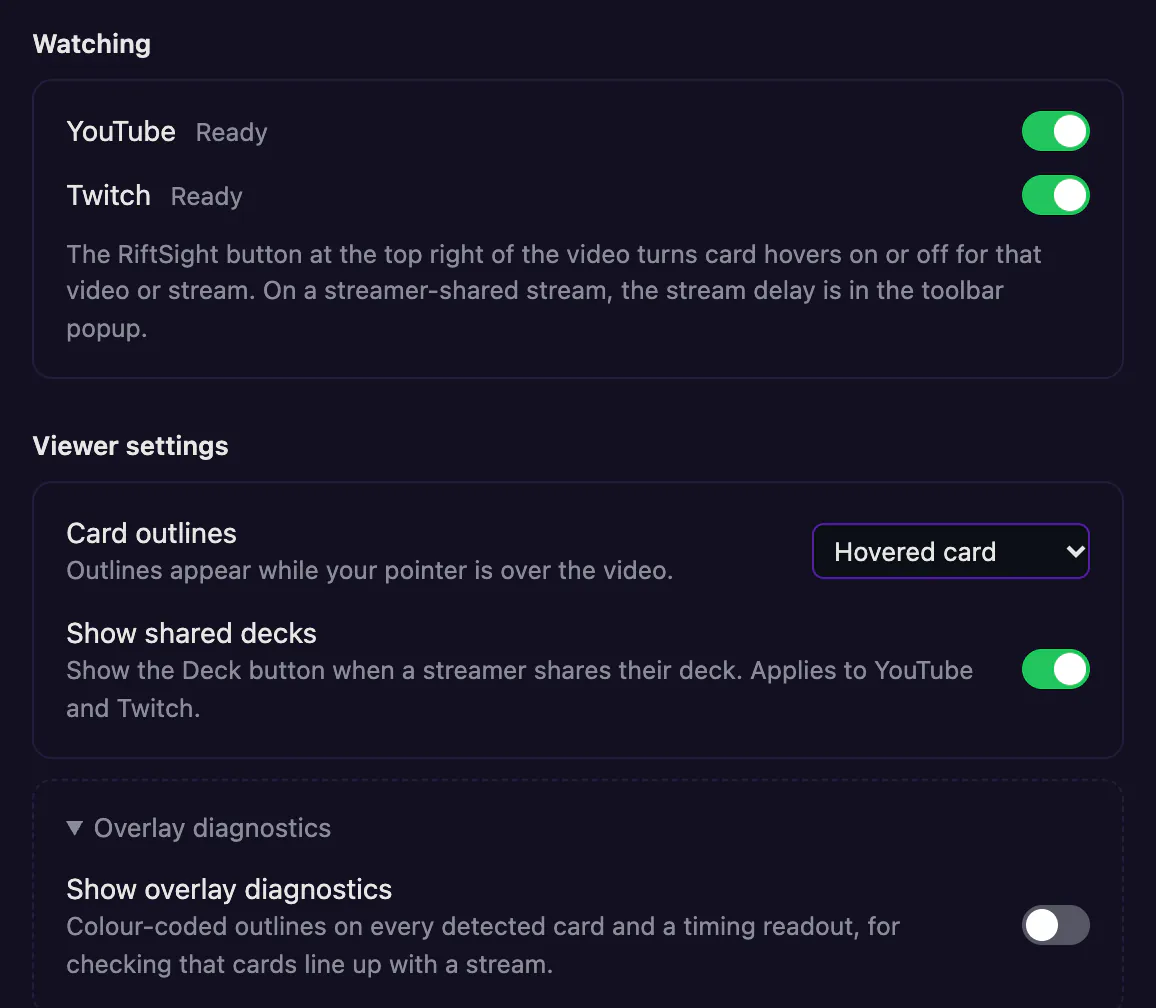
- Watching: YouTube and Twitch, each with its own switch, or Enable YouTube / Enable Twitch to turn on just one site.
- Card outlines: Hovered card (the default), All available cards, or No outlines. Outlines appear while your pointer is over the video.
- Show shared decks: turn it off to never show the Deck button. Channels you hid come back with Show on all channels.
 (full size, opens in a new tab)
 -
Already see cards on some Twitch channels?
A few channels run the older RiftSight Twitch Extension, which lets viewers hover cards with nothing installed. On those channels the RiftSight browser extension steps aside for its card hover (the popup reads Using this channel's Twitch overlay), and its Deck button still works when the streamer shares their deck. Everywhere else, card hovers come from the RiftSight browser extension.

Stream: let viewers hover your cards
- 1. Install
- 2. Link
- 3. Start a game
- 4. Check it's working
- Optional: overlay layout
- Optional: share your deck
-
Install RiftSight
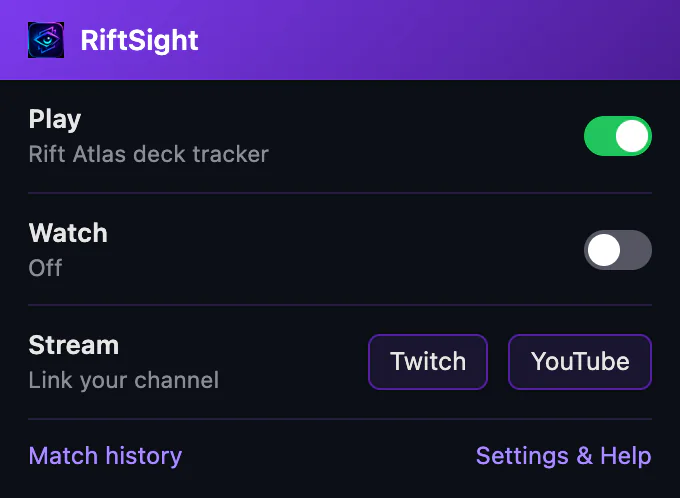
Add RiftSight from the Chrome Web Store in the same Chrome you play Rift Atlas in. The tab that opens, RiftSight is installed, has a Stream card under Also in RiftSight with Connect Twitch and Connect YouTube; the popup's Stream row has Twitch and YouTube buttons for the same thing. Tip: pin its icon so it is one click away.
RiftSight installs in Chrome, Edge or Brave on a computer.
(full size, opens in a new tab) -
Link your Twitch channel
Link your YouTube channel
Link both channels, in either order
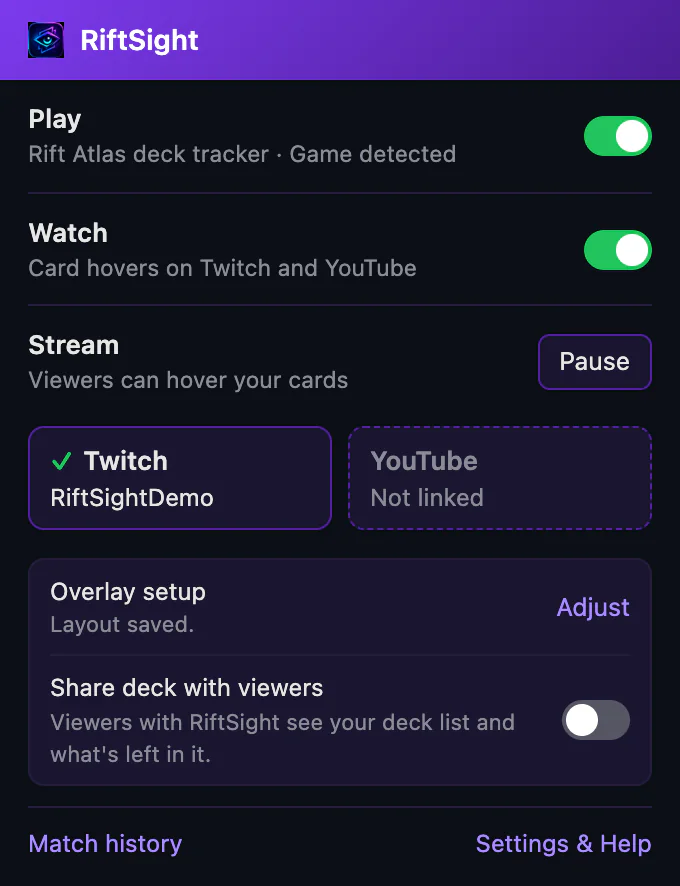
Click the RiftSight icon and, in the Stream row (Link your channel), click Twitch. Authorize RiftSight in the tab that opens. Your password stays with Twitch.
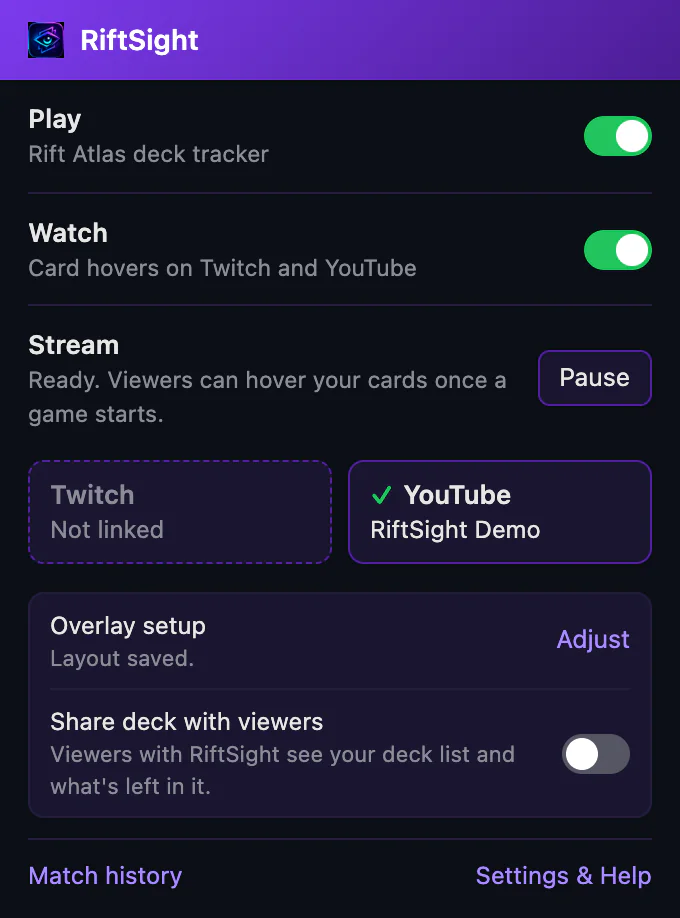
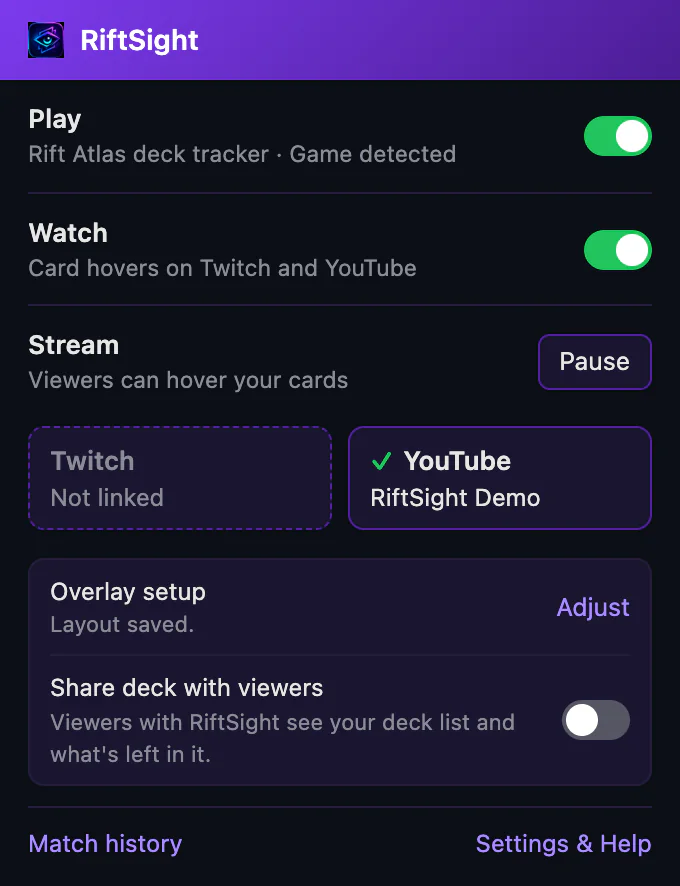
Click the RiftSight icon and, in the Stream row (Link your channel), click YouTube. Sign in with the Google account that owns your streaming channel. RiftSight checks which channel it owns; your password stays with Google.
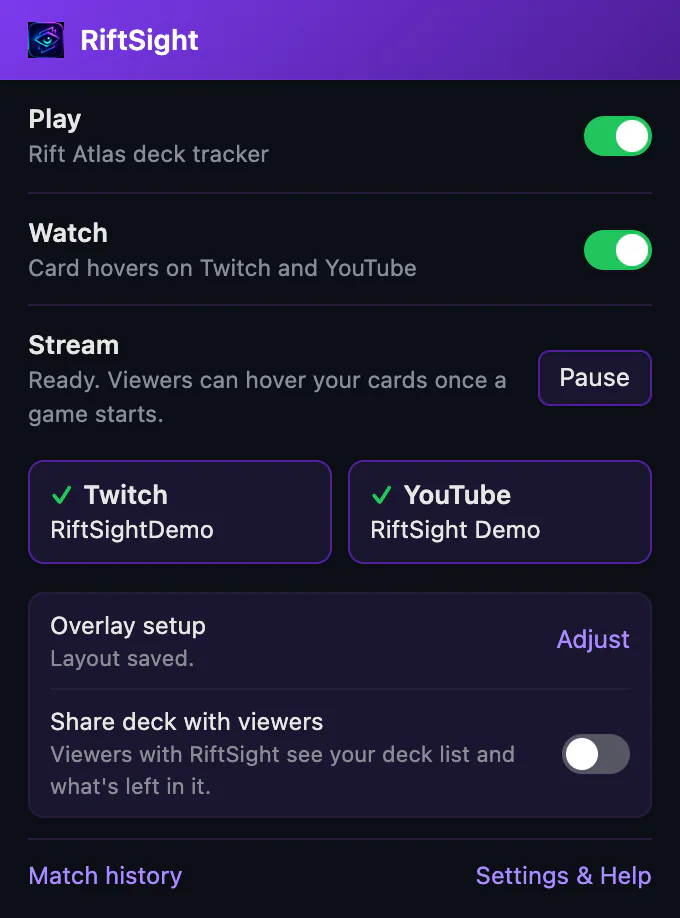
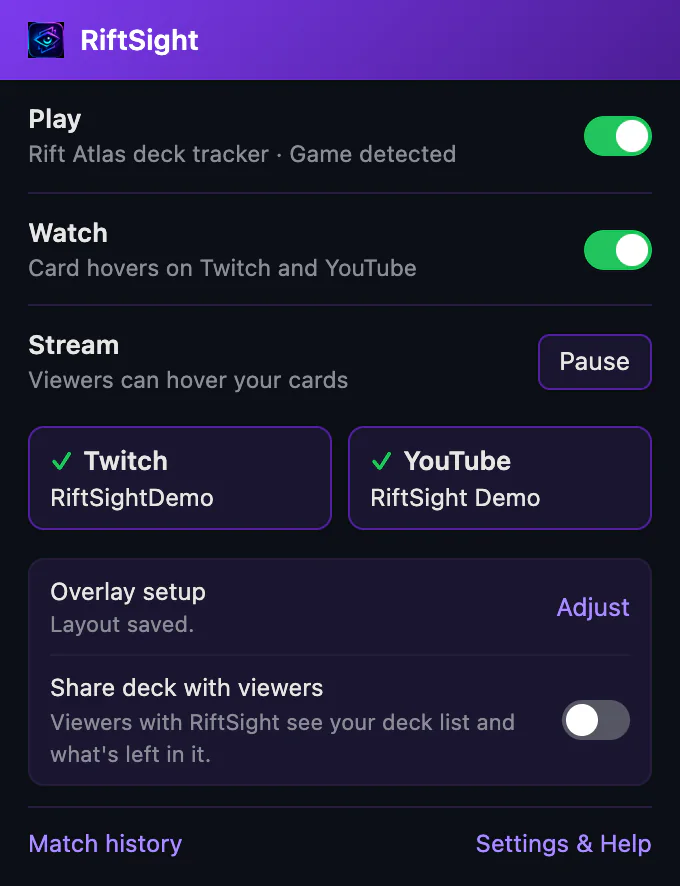
Link one platform from the popup's Stream row. Then click the other platform's Not linked box: it opens Account in RiftSight Settings & Help, where Add Twitch or Link YouTube channel joins it to the same RiftSight account. YouTube always links through the Google account that owns your channel.
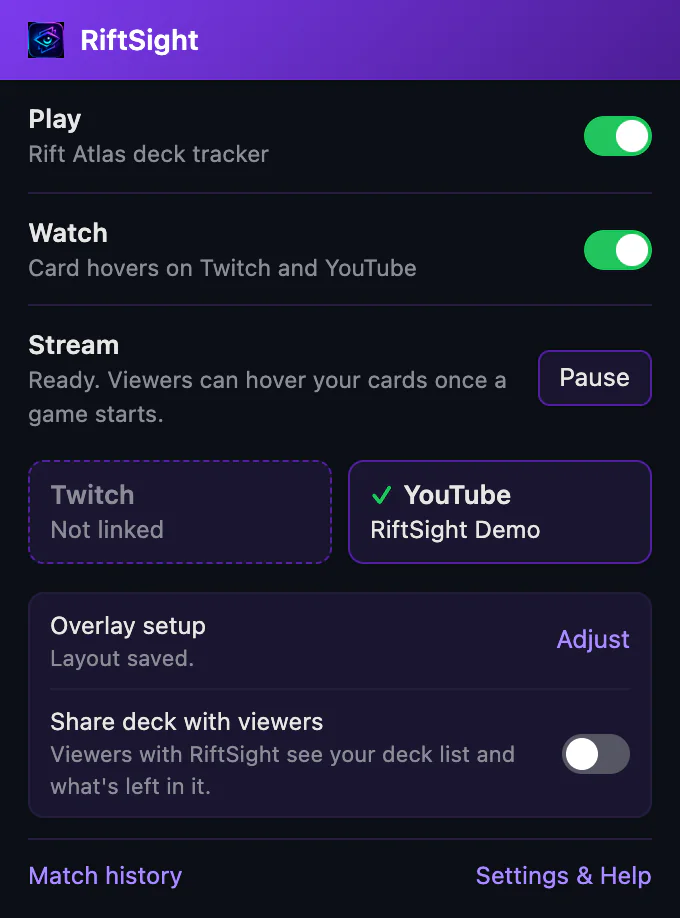
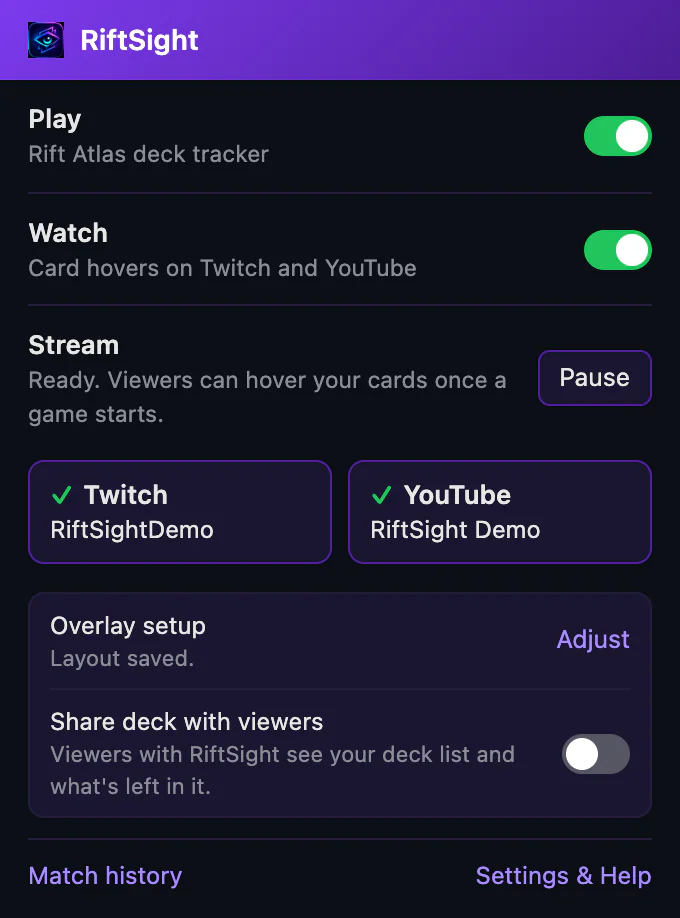
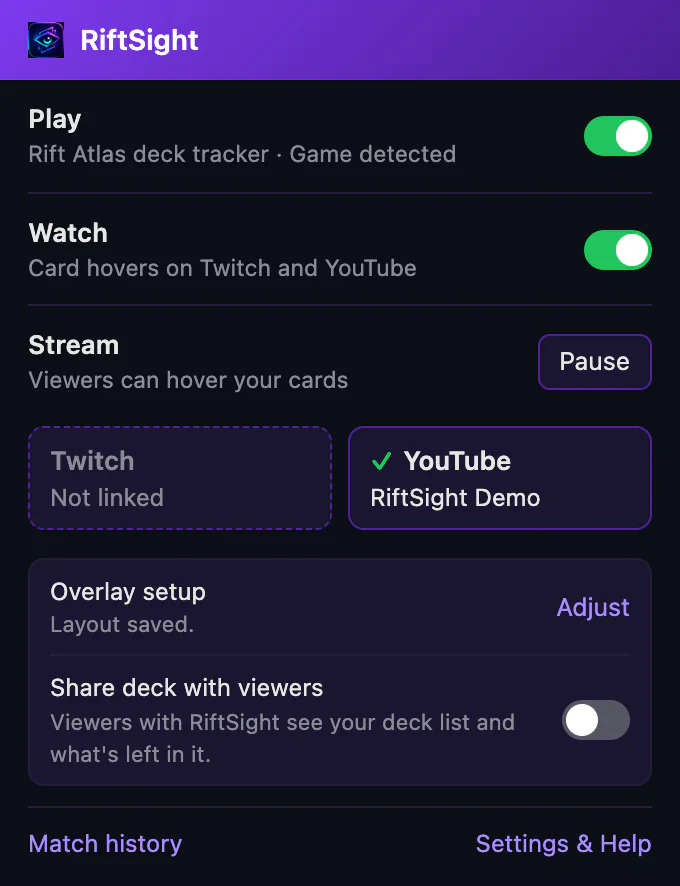
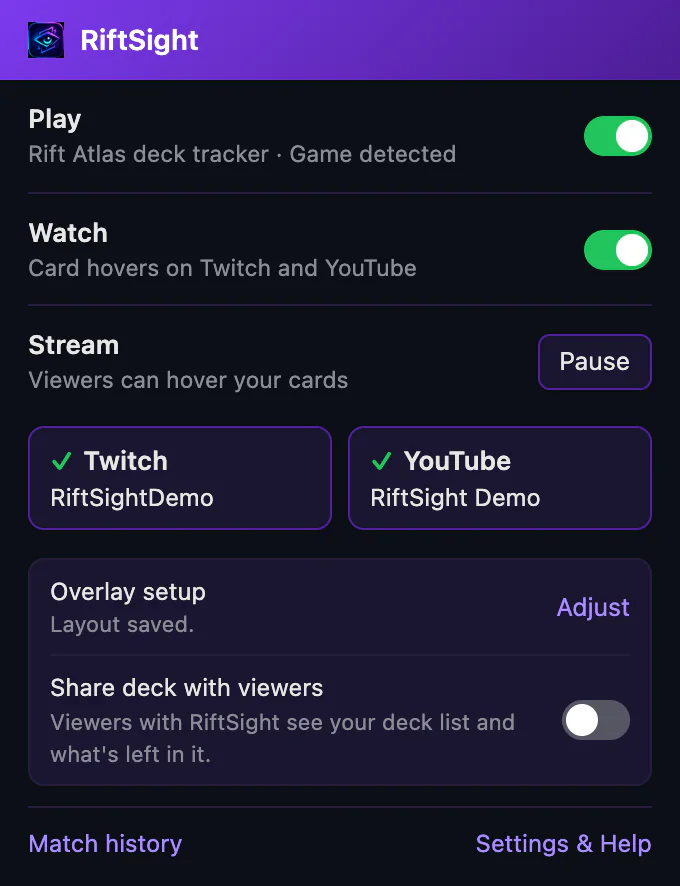
How you know it worked Under the Stream row, two boxes show your accounts: ✓ Twitch with your username, and YouTube, Not linked (click it any time to add YouTube). Under the Stream row, two boxes show your accounts: ✓ YouTube with your channel, and Twitch, Not linked (click it any time to add Twitch). Both boxes under the Stream row show a ✓: your Twitch username and your YouTube channel.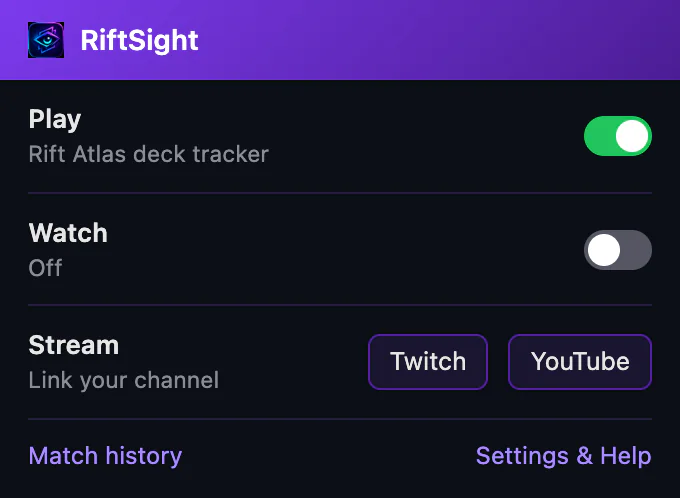 (full size, opens in a new tab)
 (full size, opens in a new tab)
 (full size, opens in a new tab)
 -
Start a game
Open Rift Atlas and get into a game (a Solo Room works). Once you're linked, viewers can hover your cards whenever Rift Atlas shows a game, on every platform you've linked. To practise off stream, click Pause in the popup's Stream row: until Chrome restarts, card hover, your shared deck and the OBS graphic all pause. Resume turns them back on.
How you know it workedThe popup's Stream row reads Viewers can hover your cards, and the toolbar dot turns green.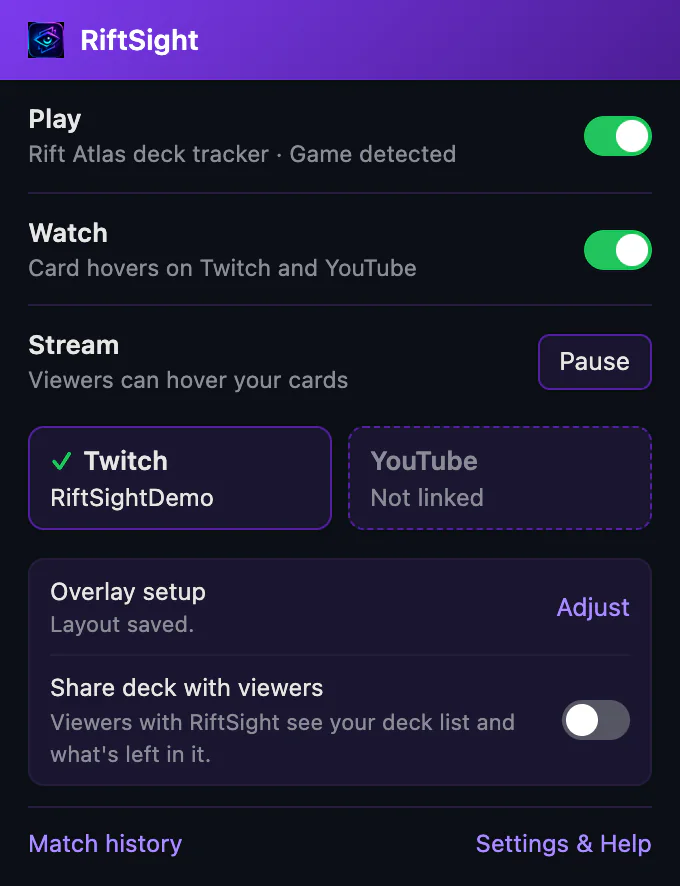 (full size, opens in a new tab)
 (full size, opens in a new tab)
 (full size, opens in a new tab)
 -
Go live: check that RiftSight is receiving your game
-
Watch the steps tick themselves
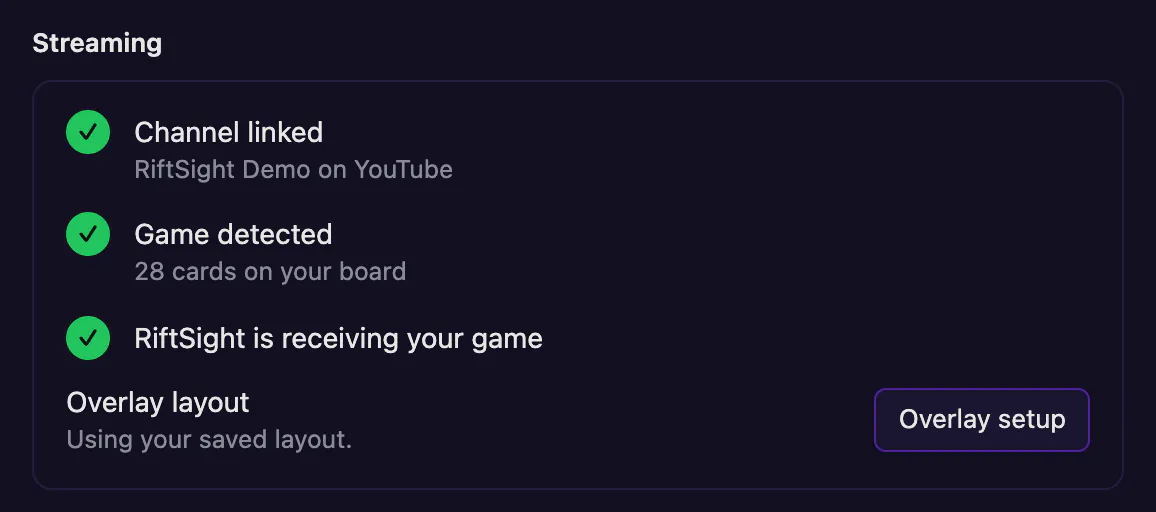
In the popup, click Settings & Help, then More settings in the Stream card. Under Streaming, the steps tick themselves during a game. You don't need a second browser profile to check.
How you know it workedChannel linked, Game detected and RiftSight is receiving your game are ticked.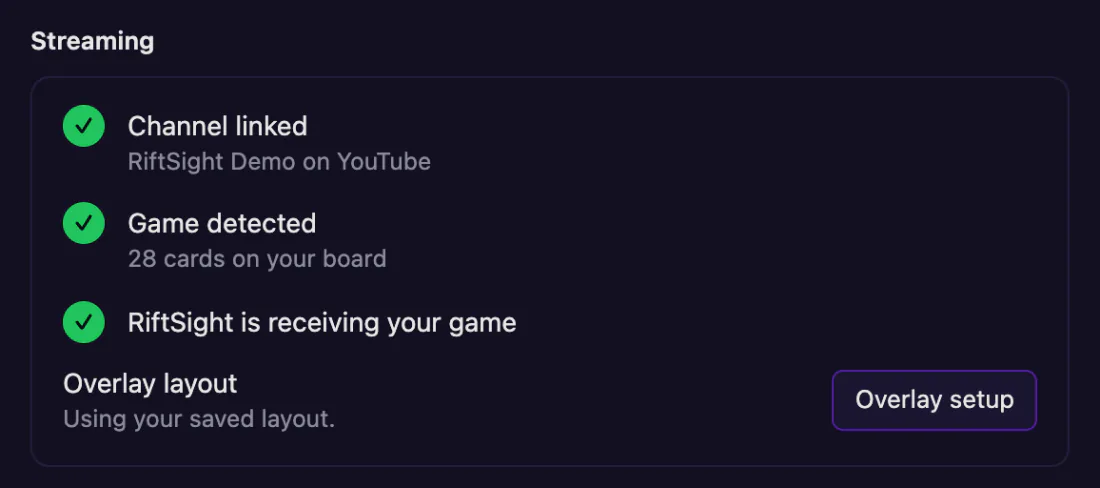 (full size, opens in a new tab)
 -
Optional: hover a card on your stream
To see what viewers get, open your live stream in a browser with RiftSight's Watch turned on (or Try on this tab) and hover a card. Give it a few seconds after the player loads: the overlay waits out your stream's delay.
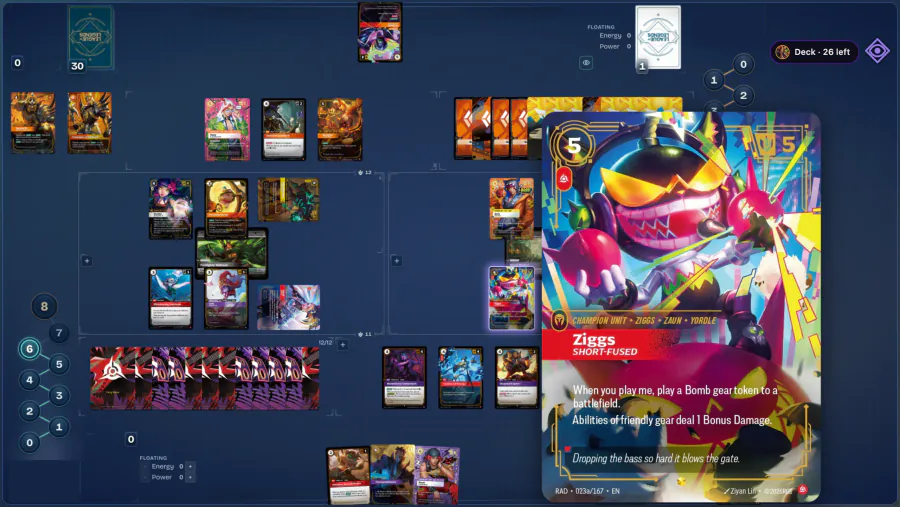 (full size, opens in a new tab)
Worth a line in your stream description: "Hover the cards on stream with RiftSight: riftsight.gg".
-
-
Check the overlay layout
Right after you link your channel, the tab that opened asks How does Rift Atlas appear on your stream? If only the game fills your video, edge to edge (a facecam on top of it is fine), click Game fills the video; if it's smaller, cropped, beside a facecam or shows browser tabs, choose Game is smaller or cropped. Then check it against your stream with a screenshot, as below; it takes a few minutes. If the default already looks right and you'd rather not, Skip this check. You can come back to it any time from Overlay setup in the popup's Stream section.
-
Take an OBS screenshot
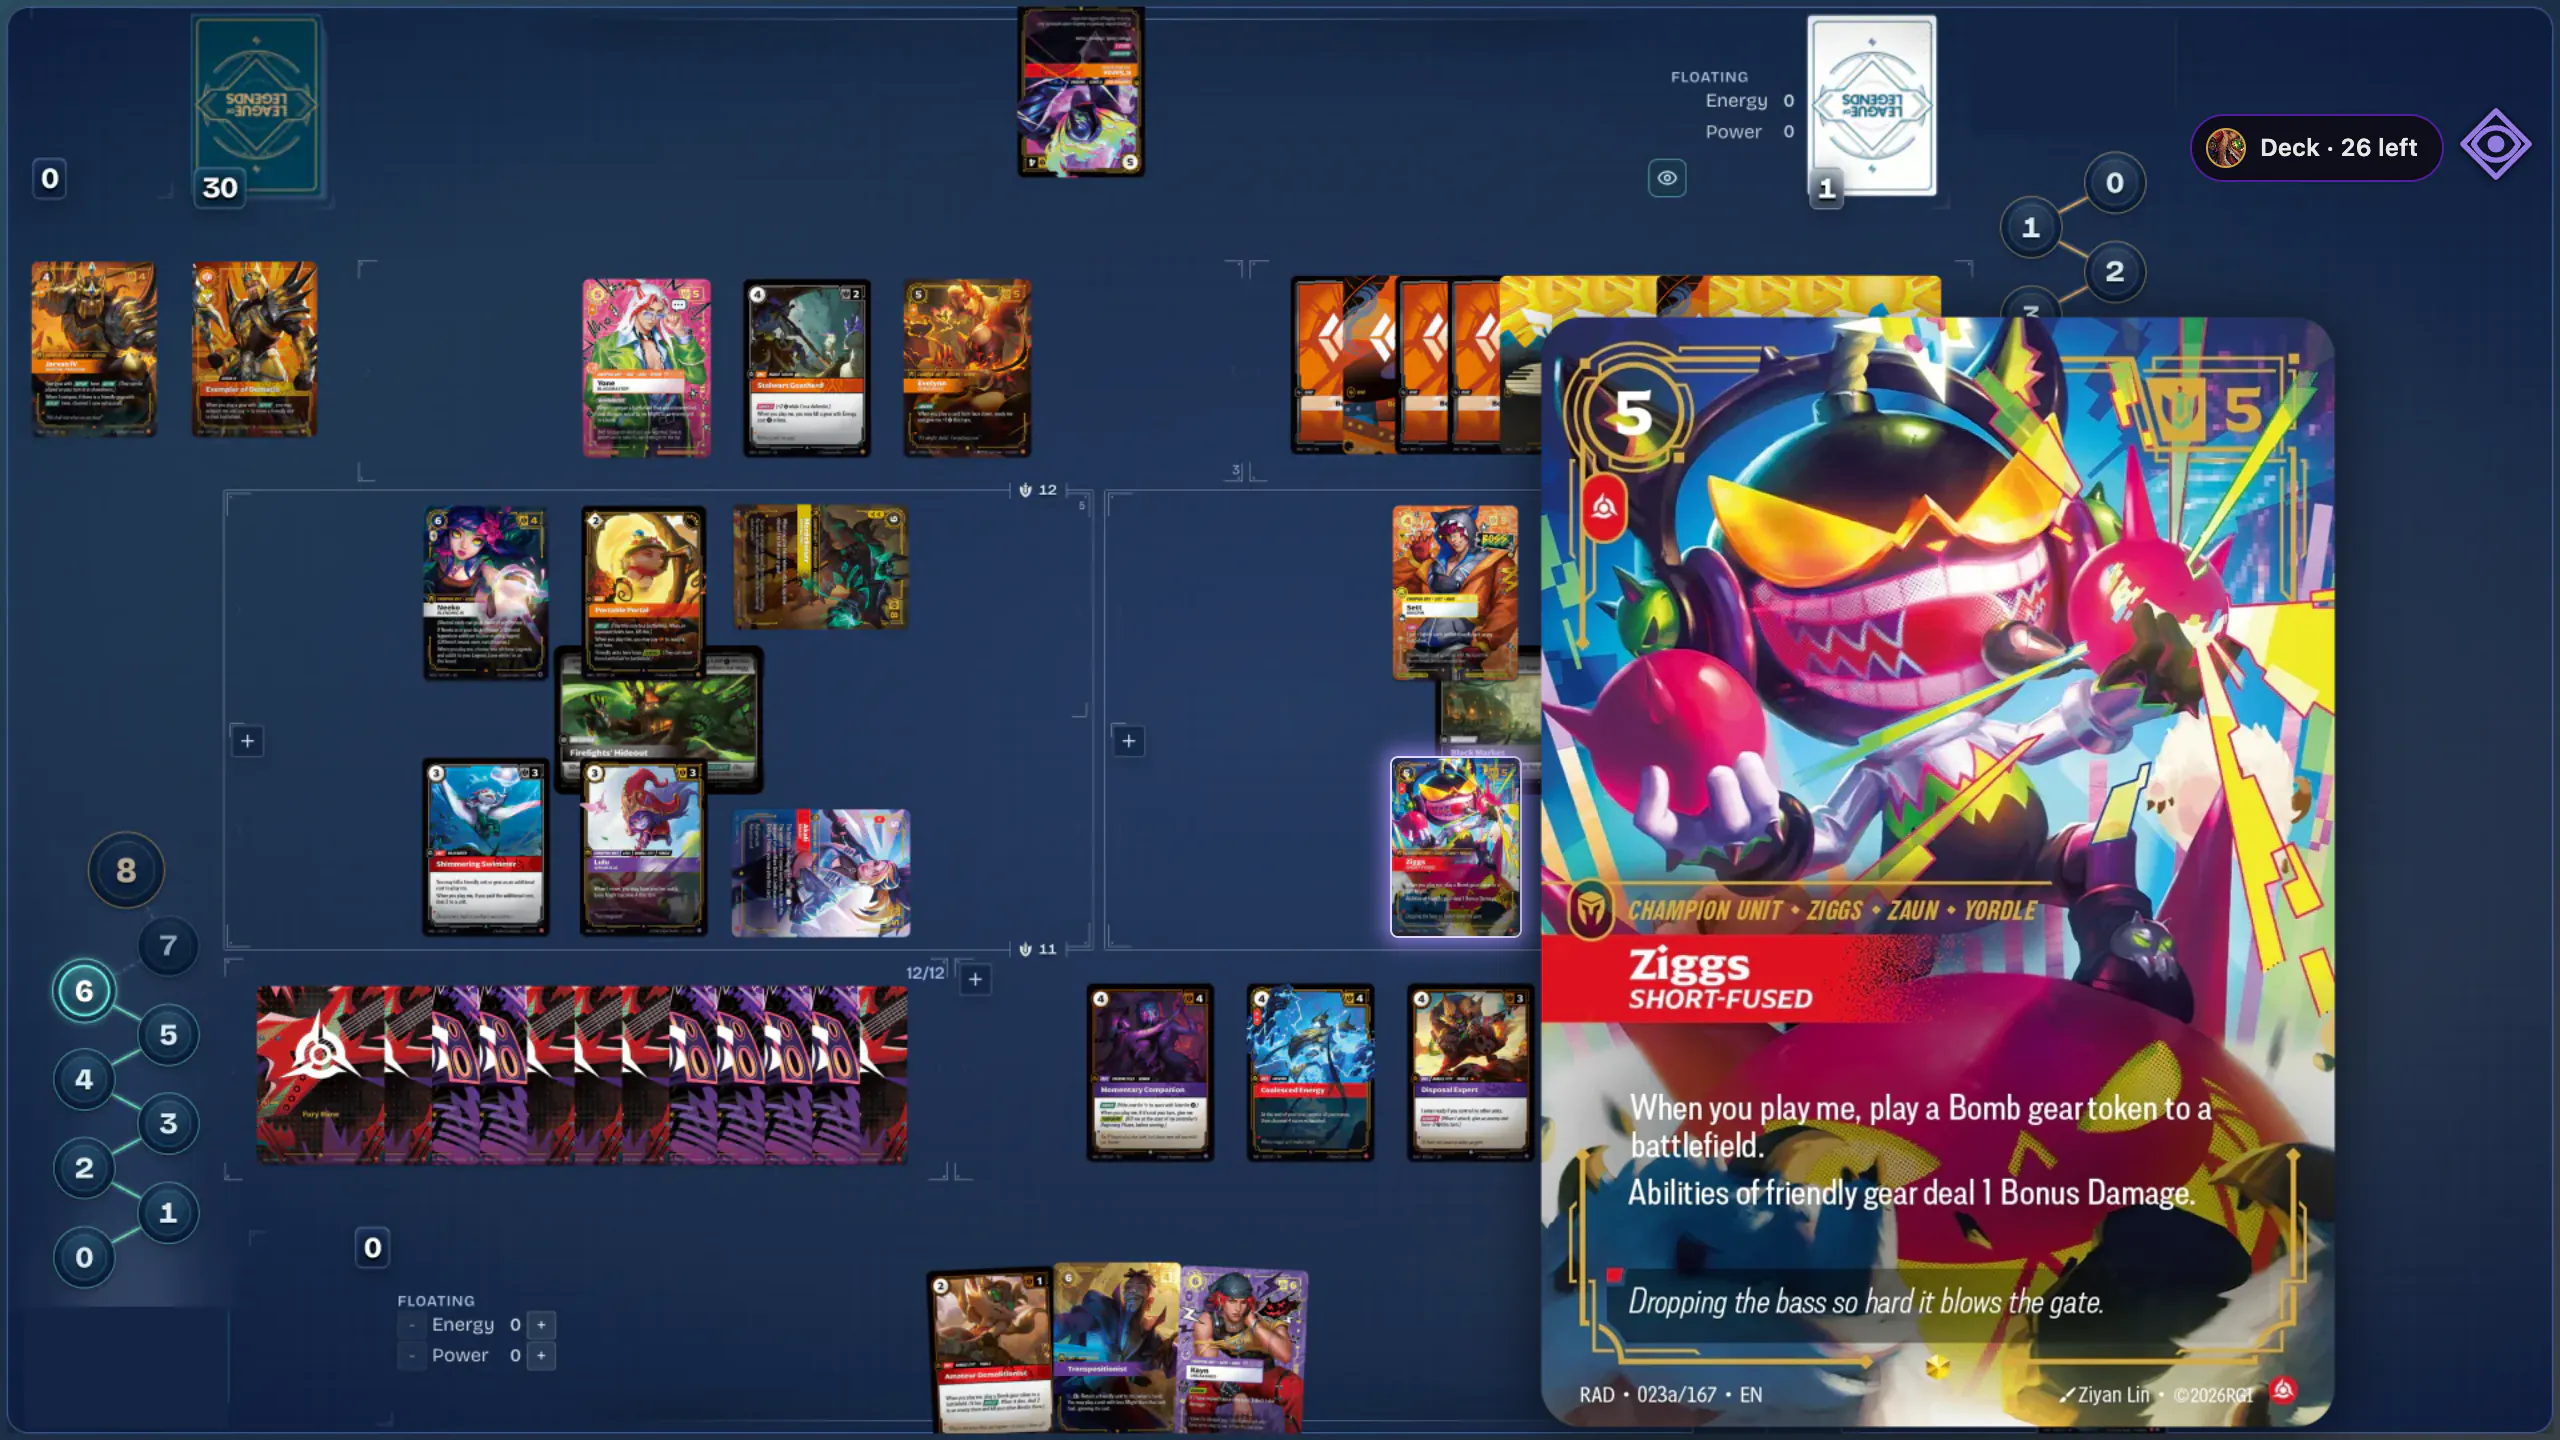
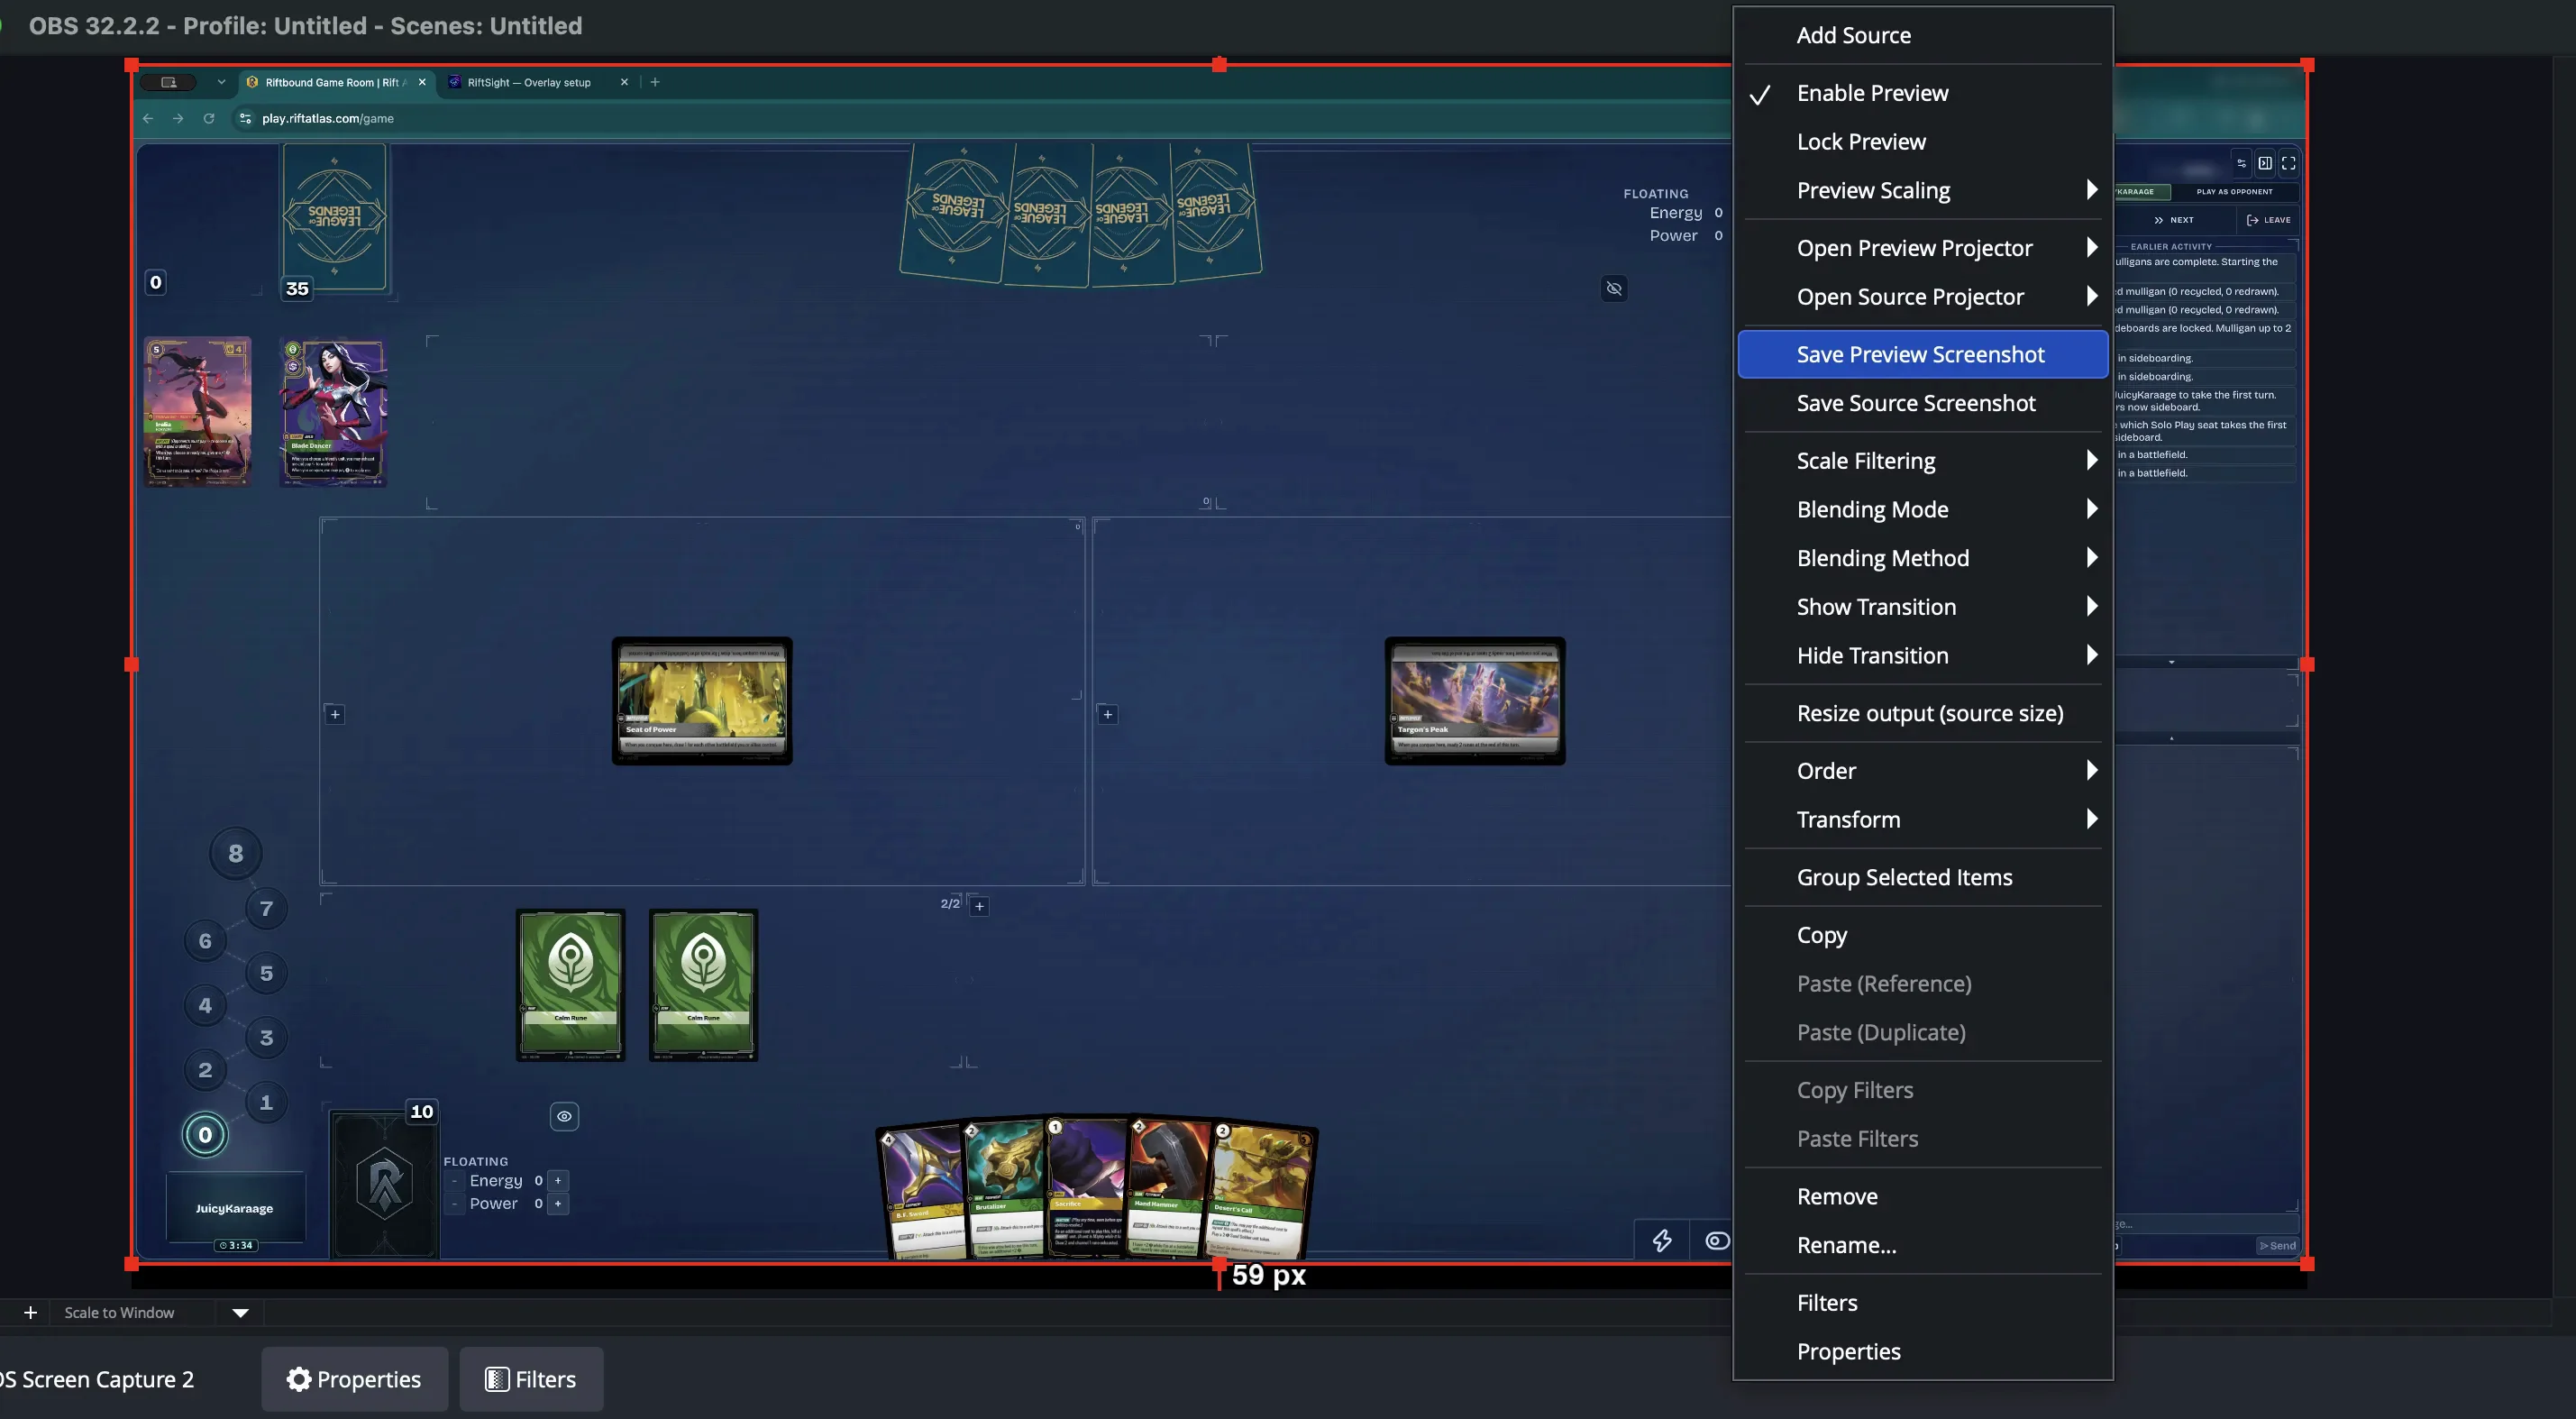
Open Rift Atlas and enter a Solo Room, so a game board is on screen, and arrange OBS exactly as your stream looks live: the Rift Atlas capture, webcam, chat and borders.
Then right-click the OBS Preview and choose Save Preview Screenshot, not Save Source Screenshot, which leaves out everything around the capture.
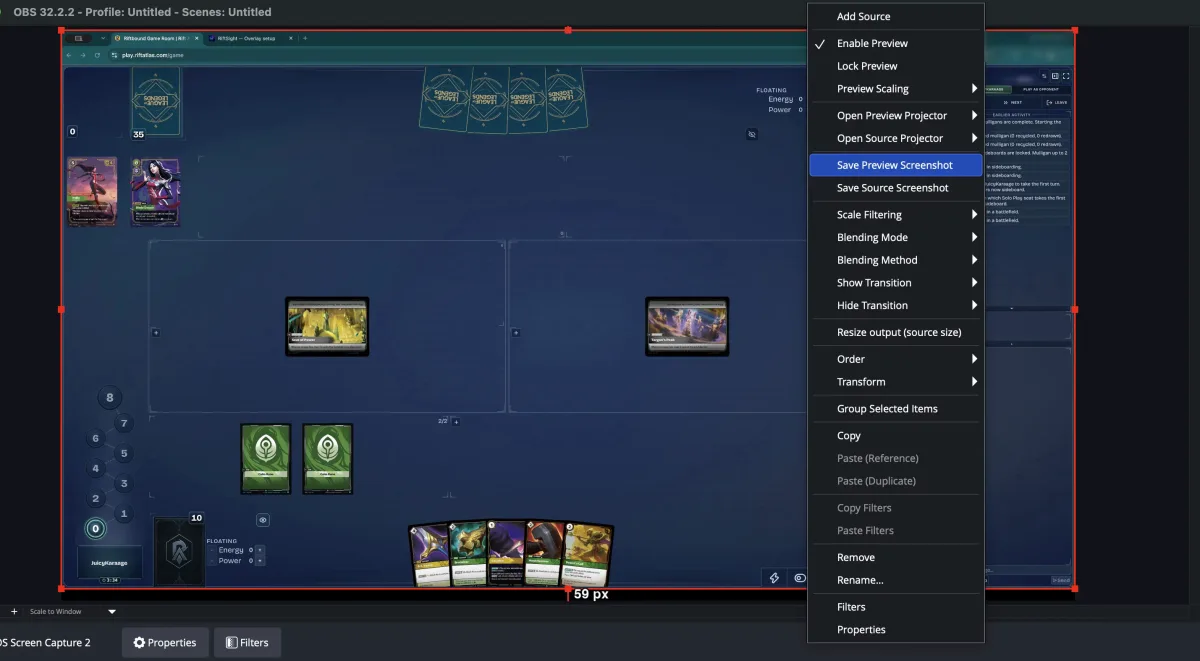 (full size, opens in a new tab)
 -
Open Overlay setup
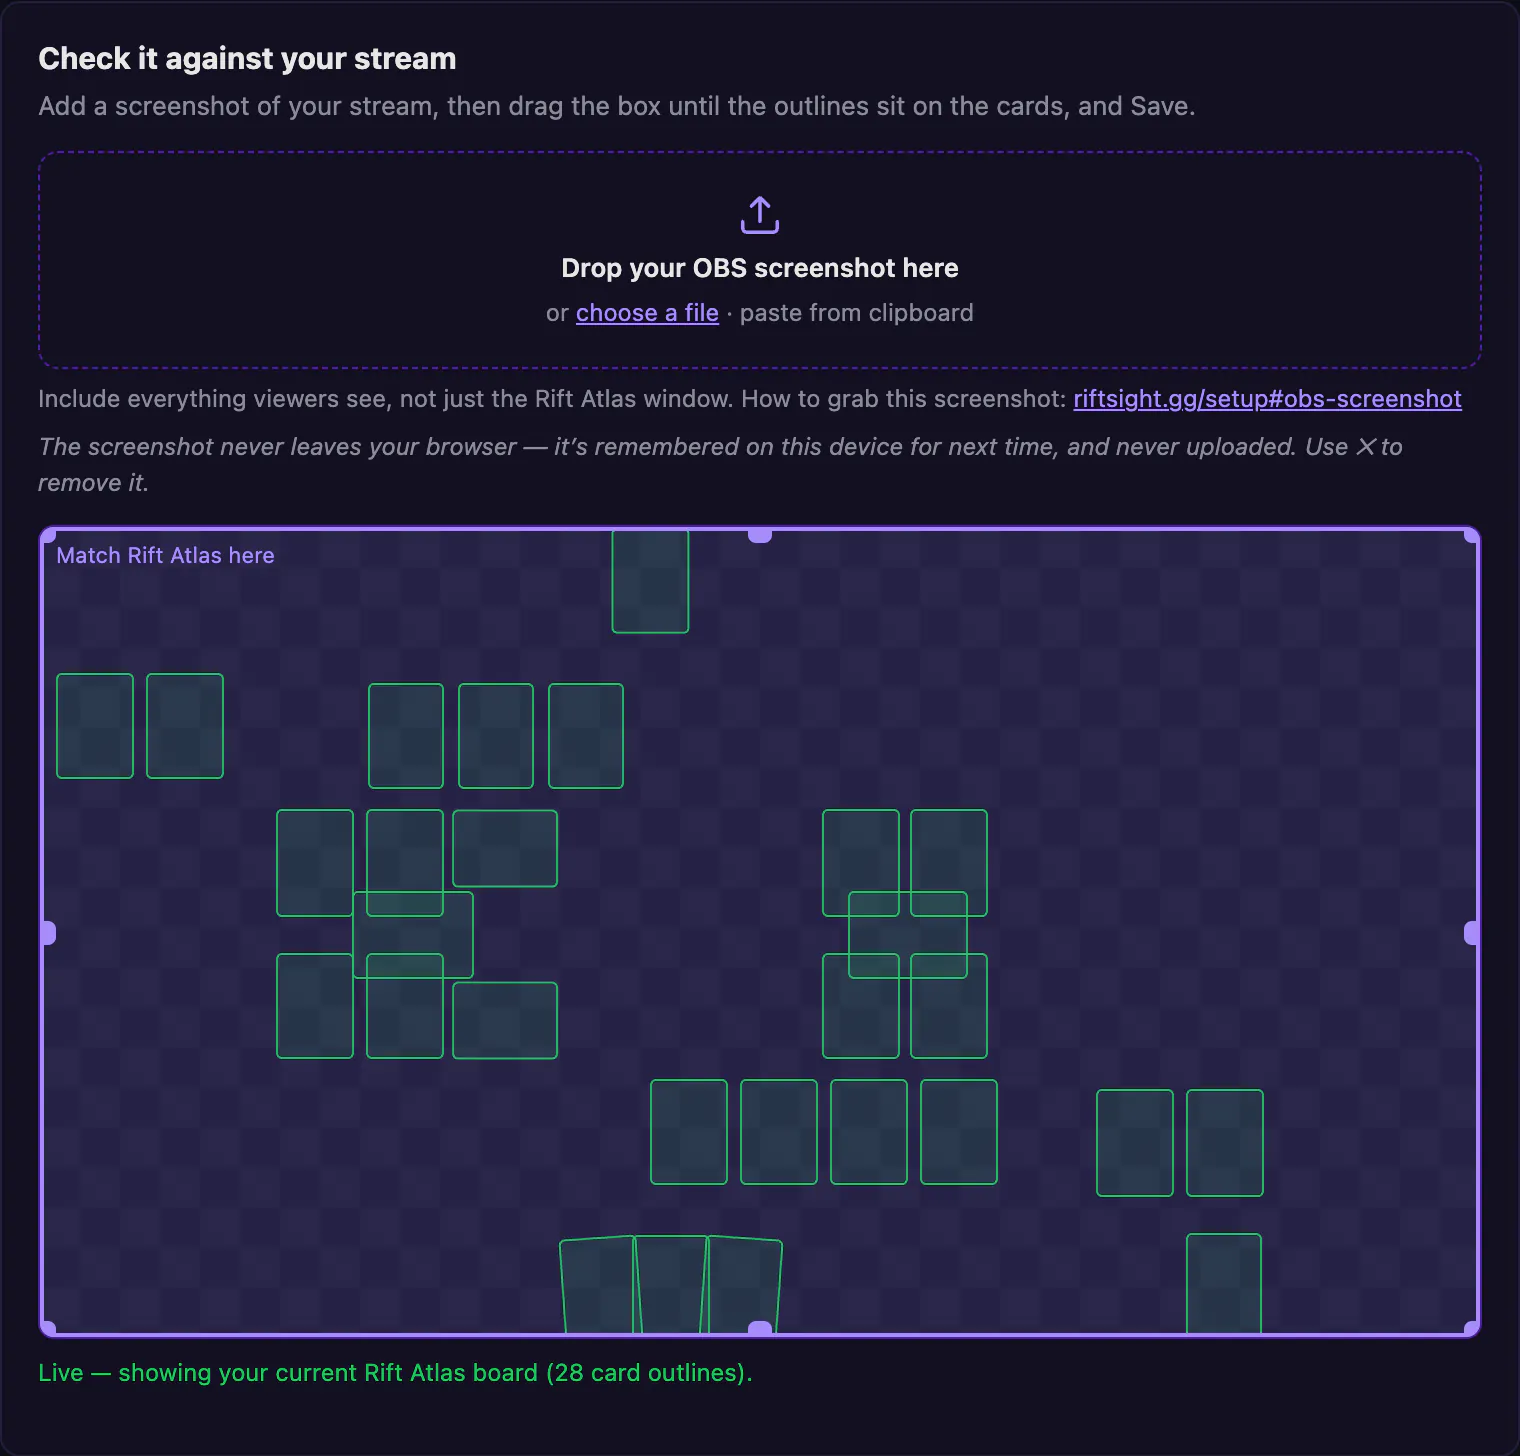
Answer the question in the tab linking opened, or open Overlay setup from the popup's Stream section or the Stream card in RiftSight Settings & Help. It tells RiftSight where Rift Atlas sits in your streamed video, so hover areas land on the cards for viewers on both platforms: one layout covers both. Until you add a screenshot, it shows the card outlines of your live board.
Canvas not 16:9? Set the aspect-ratio override under More options › Advanced settings first.
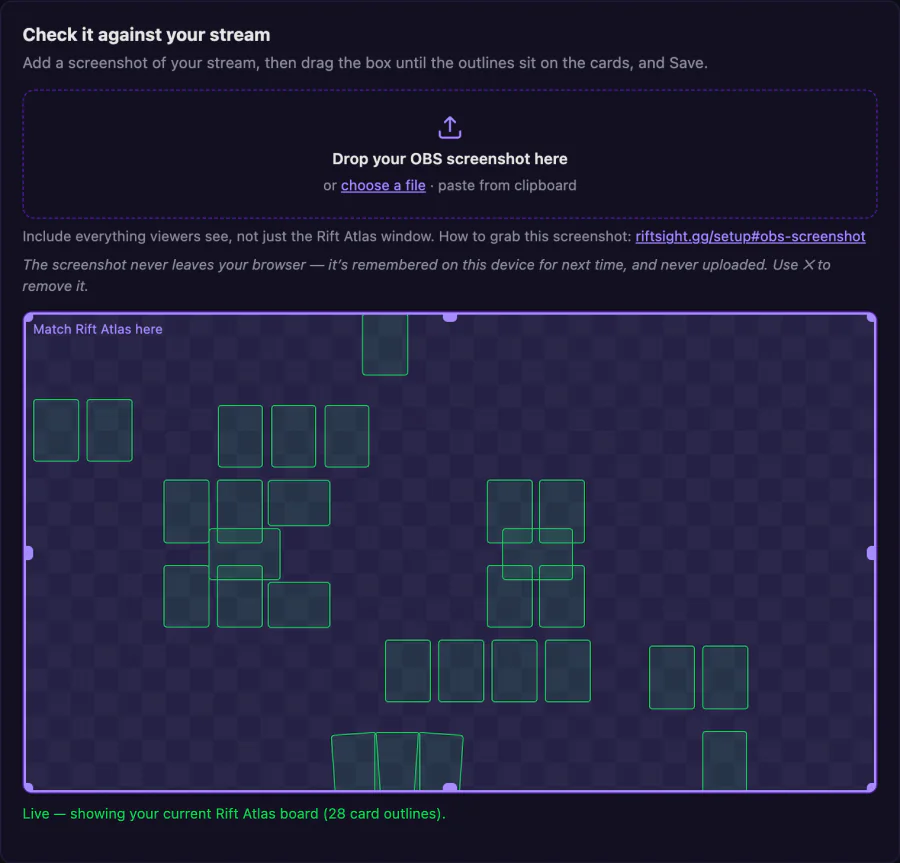 (full size, opens in a new tab)
 -
Drop in the screenshot and match the box
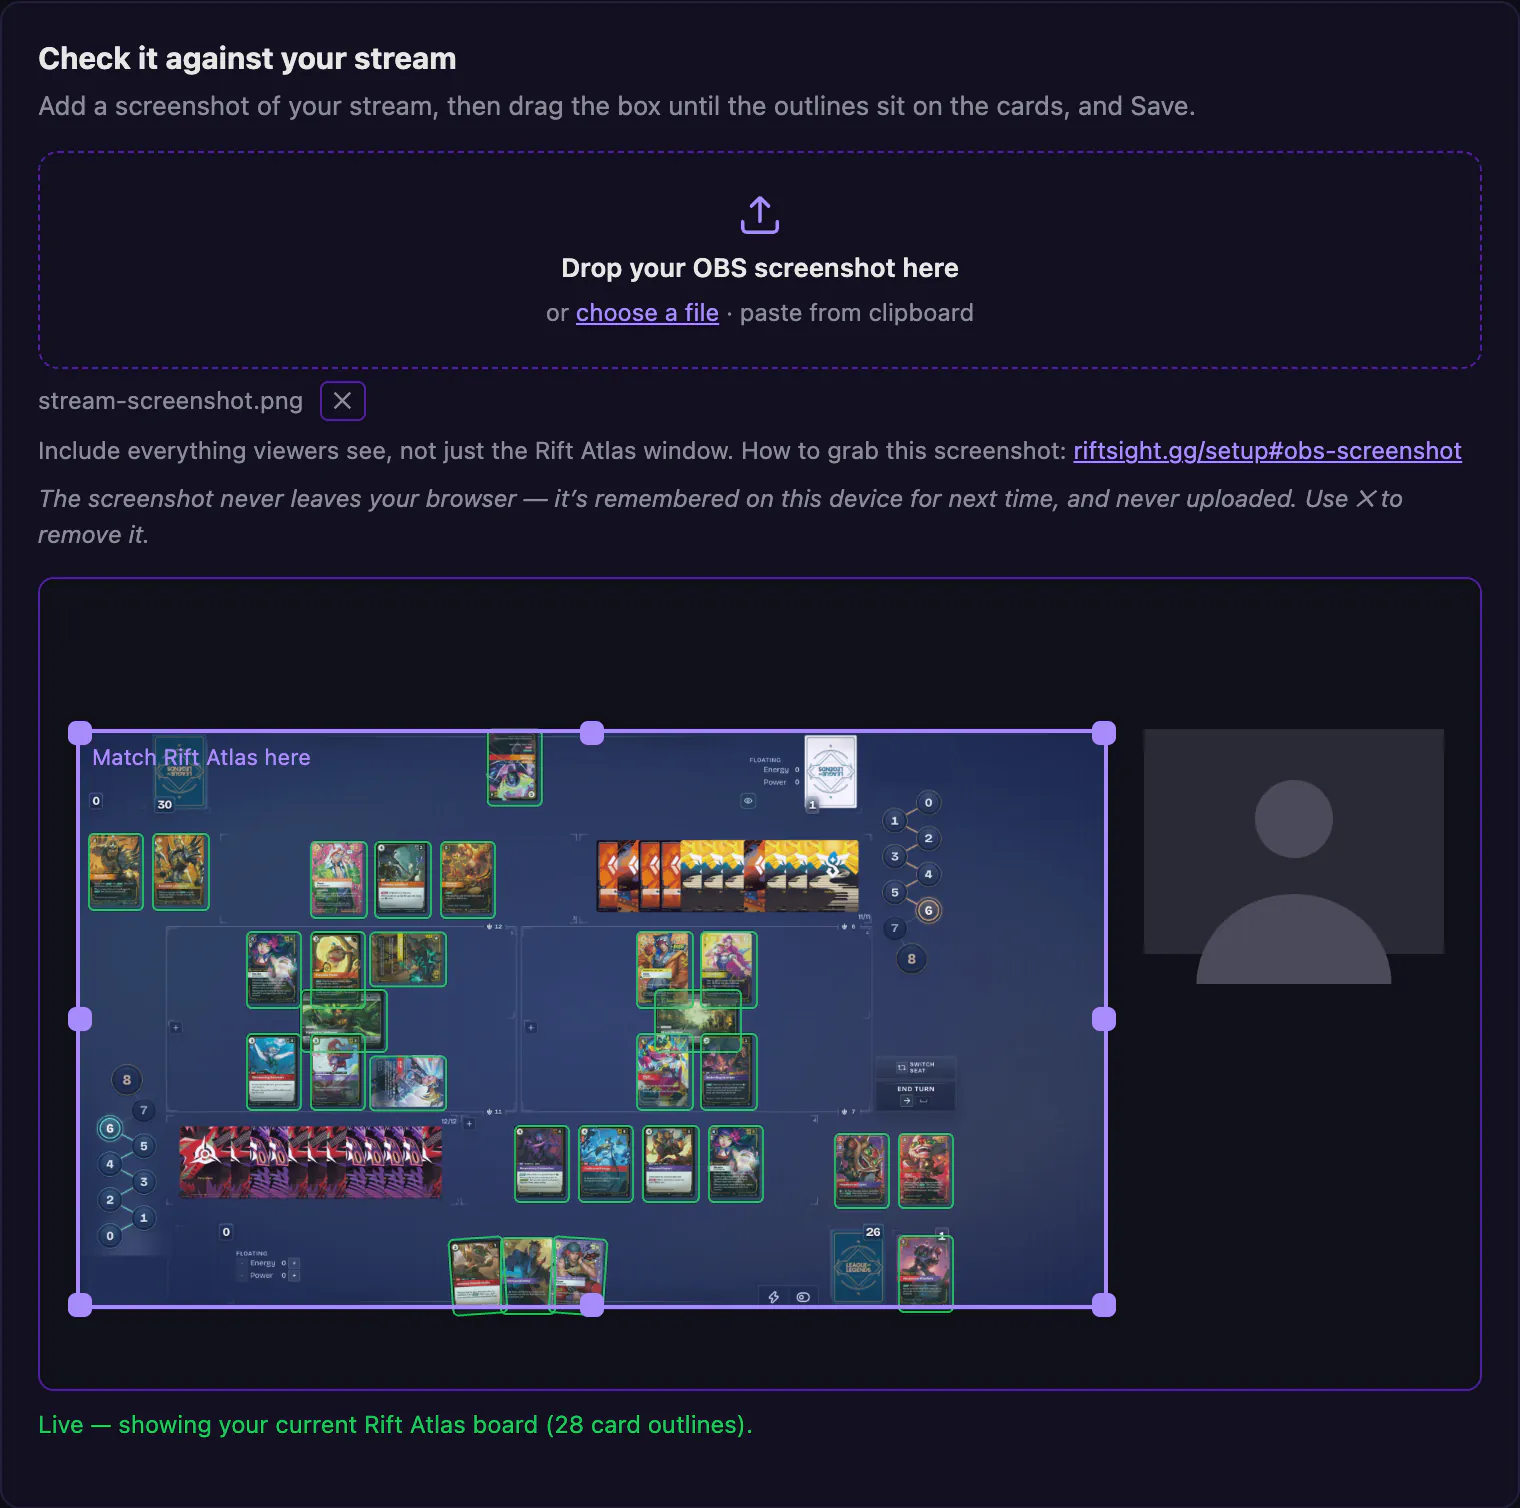
Drop the image under Check it against your stream (it stays in your browser; it's never uploaded). Then drag the box until the outlines sit on the cards, and click Save.
How you know it workedThe outlines sit on the cards in your screenshot, the save bar reads Saved, and the popup's Overlay setup row reads Layout saved.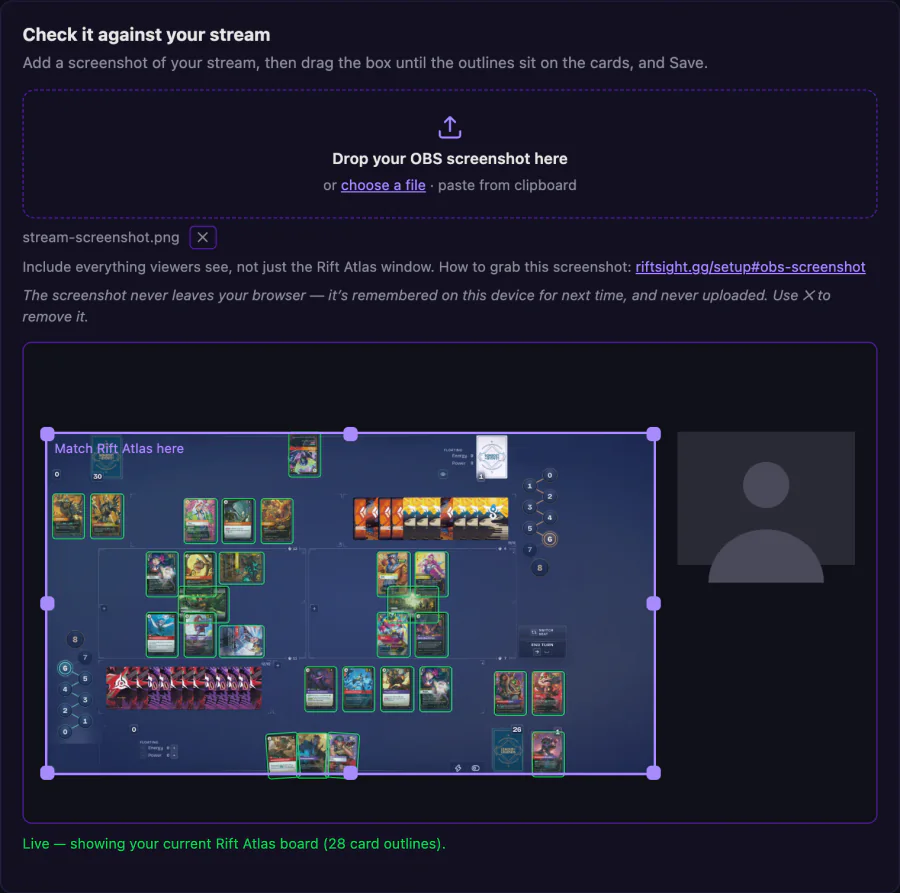 (full size, opens in a new tab)
 -
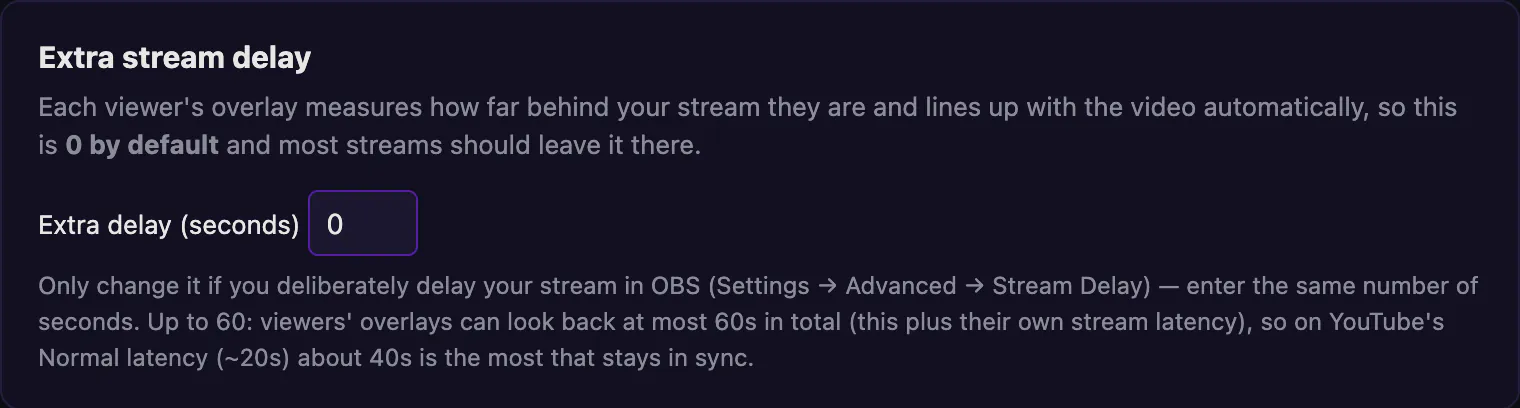
Extra stream delay
Under More options. Leave it at 0. Each viewer's overlay measures your stream's delay automatically; set it only if you delay your stream in OBS.
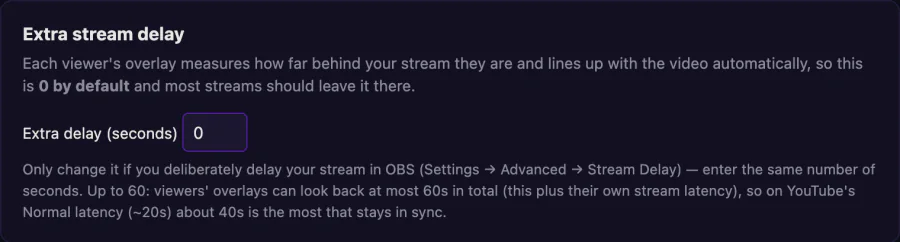 (full size, opens in a new tab)
 -
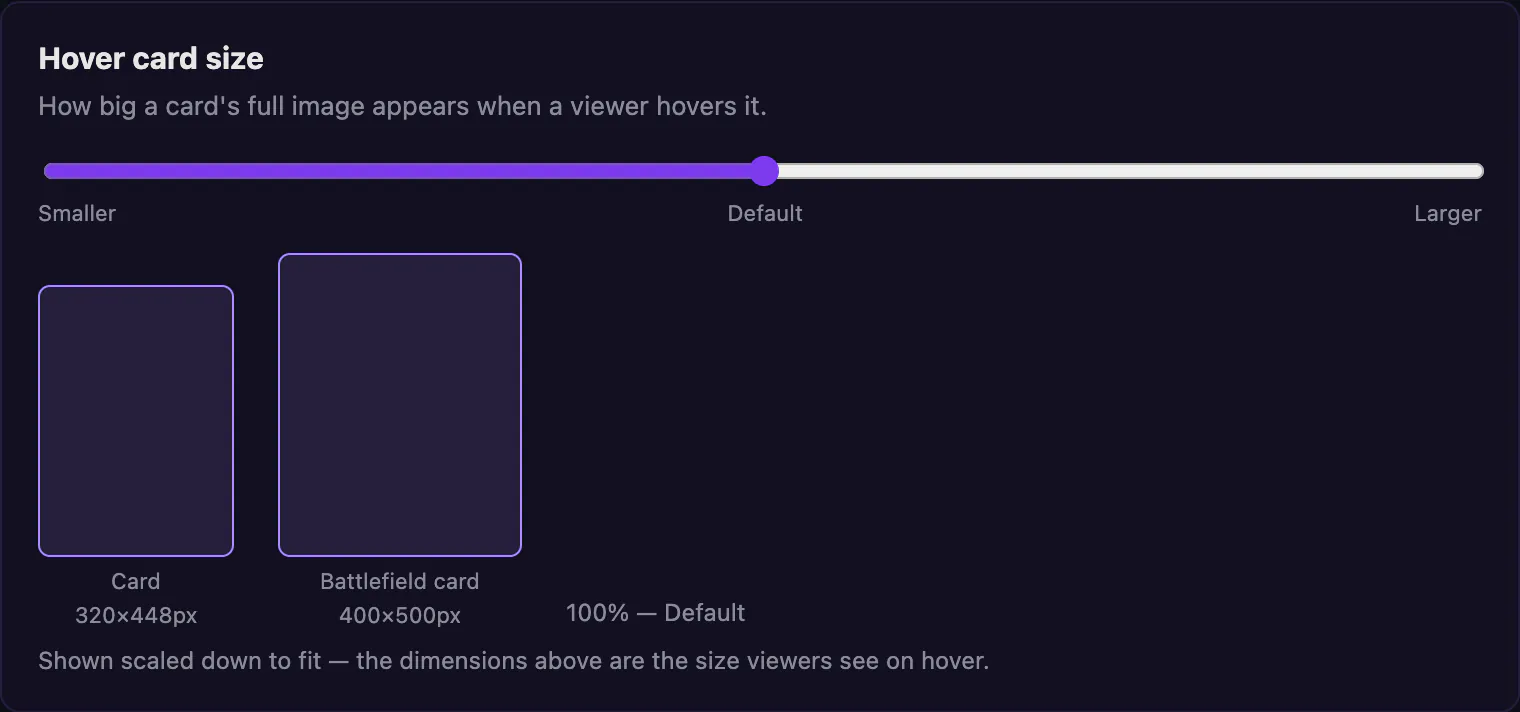
Hover card size
Under More options. Smaller, Default or Larger, drawn at the size viewers see.
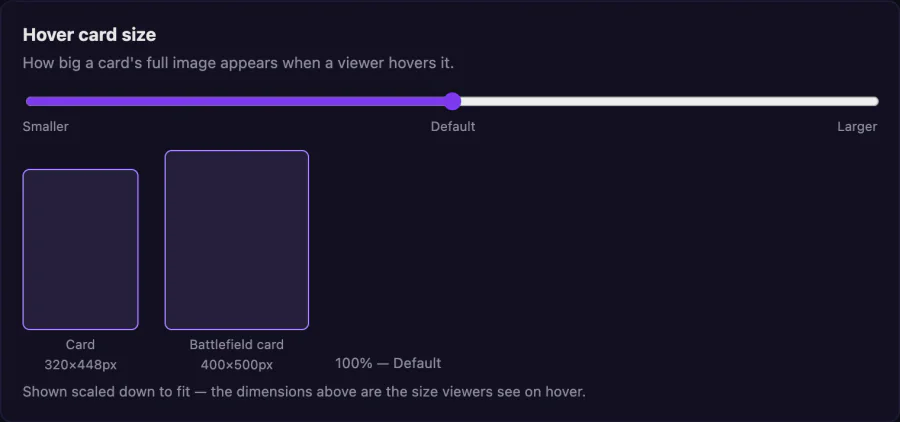 (full size, opens in a new tab)
-
-
Optional: share your deck
Two separate switches, both off by default; either can be on without the other. Both share your deck list with the copies left, which can let viewers work out cards in your hand. A stream delay makes that less useful to an opponent watching.
-
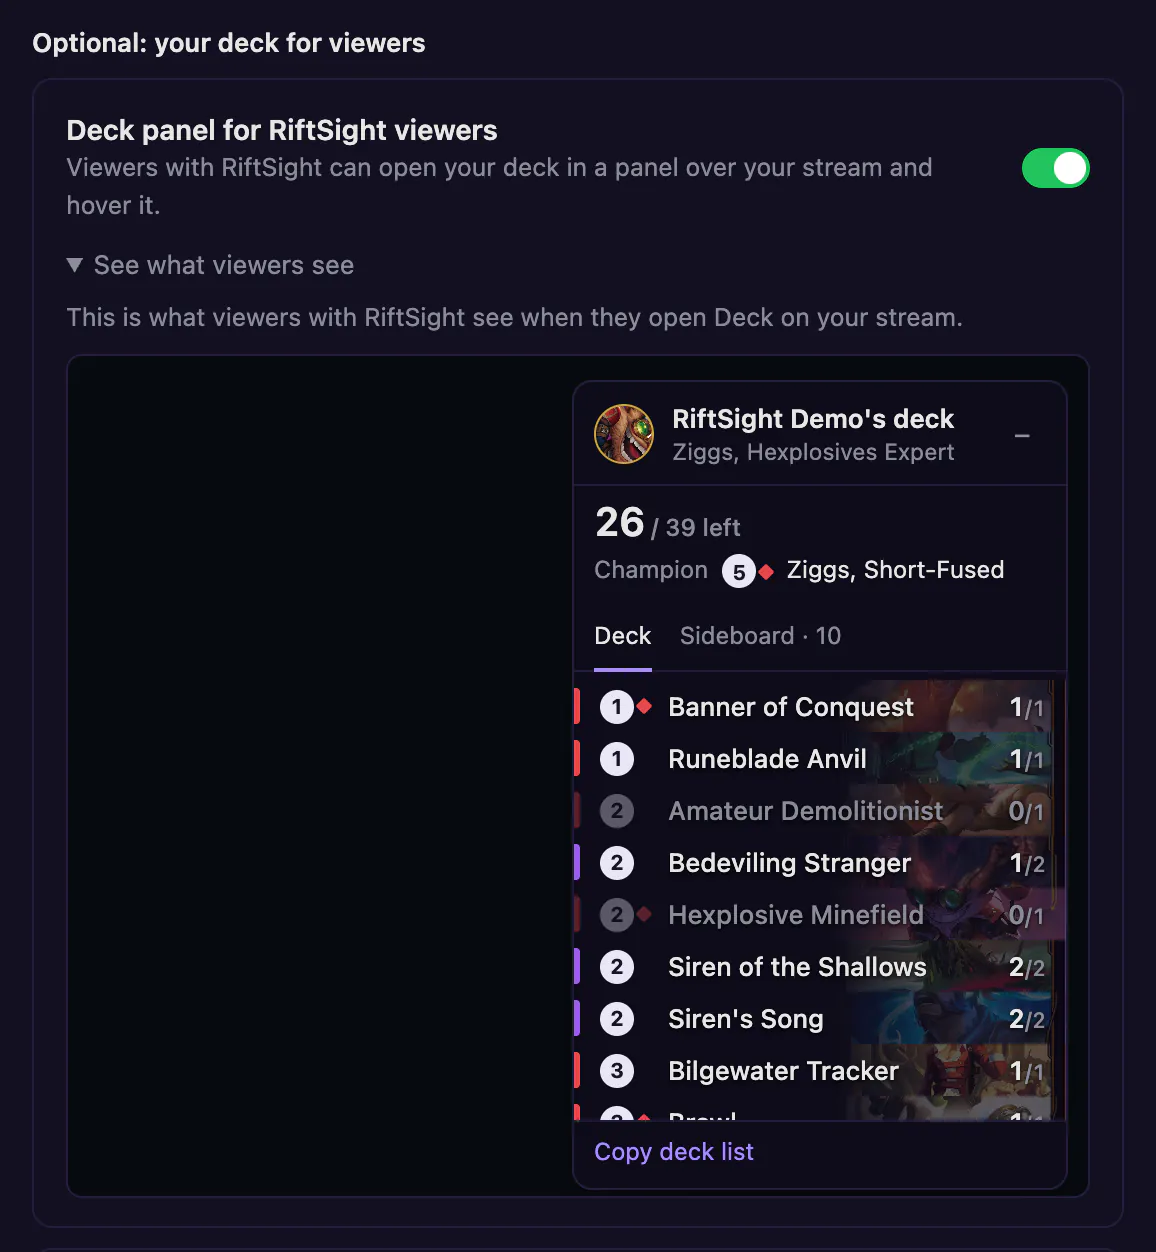
Viewers with RiftSightDeck panel for RiftSight viewers
Turn on Share deck with viewers in the popup's Stream row (it is also in the deck tracker's ⚙, and in RiftSight Settings & Help as Deck panel for RiftSight viewers, under More settings in the Stream card). Viewers get a Deck button on your stream: your list with cards left, champion and sideboard, which they can hover and copy. A Shared marker shows in the tracker while it is on. Shared counts can let viewers work out cards in your hand.
See what viewers see, under the switch in Settings & Help, shows the panel exactly as viewers get it during a game.
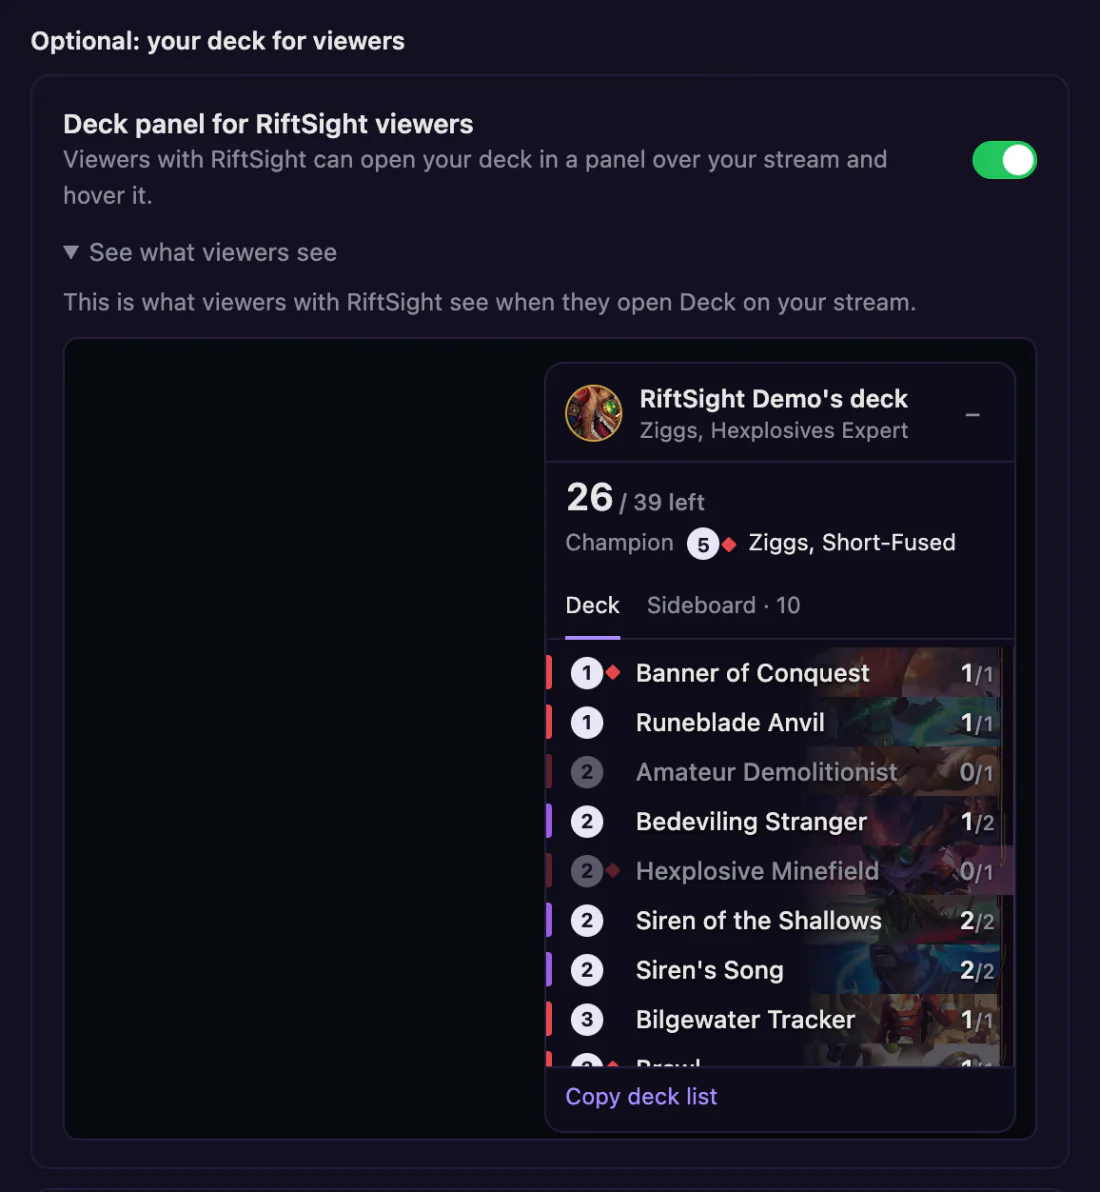 (full size, opens in a new tab)
 -
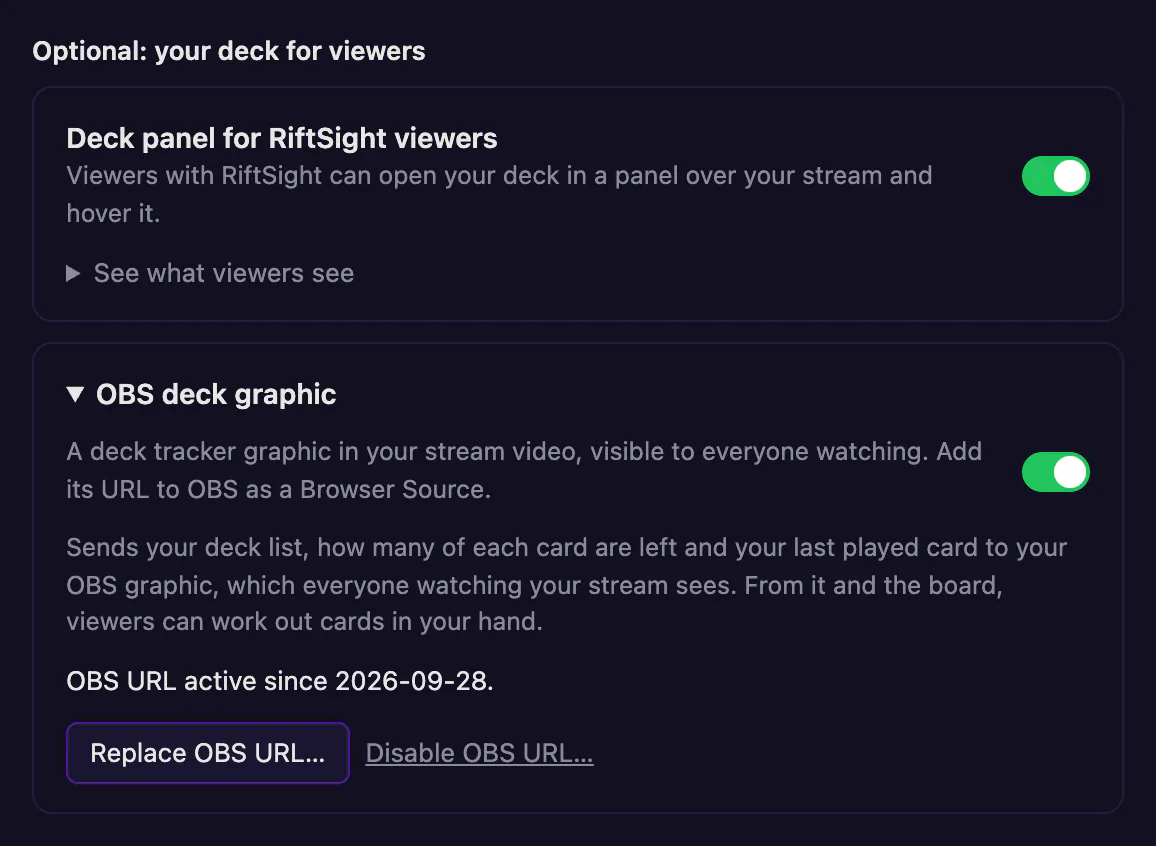
Everyone watchingOBS deck graphic
A deck tracker graphic in your stream video, visible to everyone watching. In RiftSight Settings & Help, below the Deck panel: open OBS deck graphic, turn it on, click Create OBS URL and add the URL to OBS as a Browser Source (Replace OBS URL… makes a new one and turns the old one off). It shows your remaining deck and last card played; like the Deck panel, its counts can let viewers work out cards in your hand.
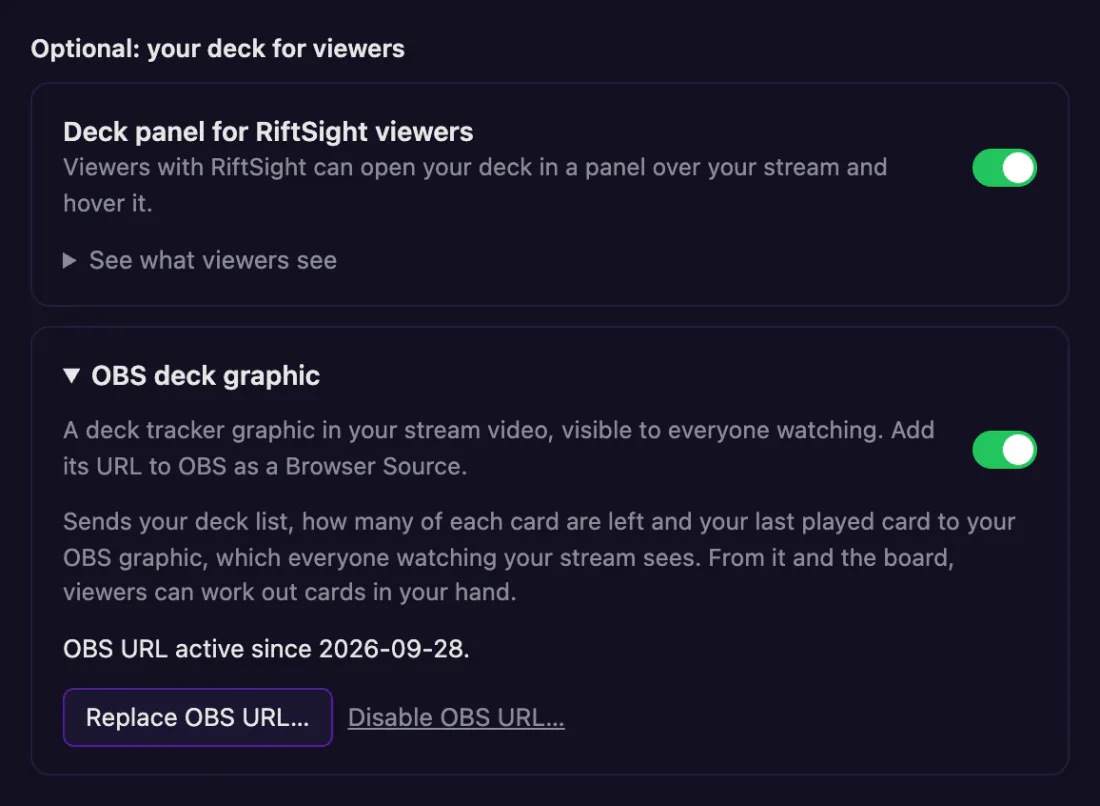 (full size, opens in a new tab)
-
Common questions
Do my viewers need to install anything?
Yes, once: viewers use the RiftSight browser extension (Chrome, Edge or Brave on a computer) and turn on Watch, or click Try on this tab in its popup while your stream is open. No RiftSight account. On a channel that also runs the older RiftSight Twitch Extension, viewers with nothing installed can hover cards through it.
Already using the RiftSight Twitch Extension?
It keeps working, and viewers without the browser extension still see it. New streamers don't need it. On a channel that runs it, the browser extension steps aside for its card hover, and the Deck button still works. To use your Overlay setup layout in it, open its Configure page and click Use your RiftSight overlay layout.
Do I need to click anything each time I stream?
No. Once you're linked, RiftSight shares your board whenever Rift Atlas shows a game, through reloads and browser restarts. Pause stops it until Chrome restarts; Resume turns it back on.
Does the deck tracker need an account or a stream?
Neither. It works for anyone who plays on Rift Atlas, and your games stay in your browser. Linking Twitch or YouTube is only for sharing your board with viewers.
What does sharing my deck show?
Your deck list with the copies left, your champion and legend, and (for Share deck with viewers) your sideboard, battlefields and runes. Never your hand as such, but the list, the copies left and the board together can let viewers work out cards in your hand. Both switches are off by default. The Privacy Policy lists exactly what is sent.
Does it work on videos whose streamer doesn't use RiftSight?
Yes, for games on Rift Atlas and TCG Arena and for physical play filmed from above, on YouTube videos and live streams and on twitch.tv channels and videos. Click the RiftSight button on the video once, then rest the pointer on a card. Recognition runs in your browser and video frames are never uploaded. When RiftSight isn't sure what a card is, it shows nothing. Newly revealed cards are added in regular updates.
A card in a video shows nothing when I hover it. Why?
First check that card hovers are on for that video: click the RiftSight button at the top right of the player (the popup says whether they're on). Then rest the pointer on the card for a moment. When RiftSight isn't sure what a card is, it shows nothing rather than guess, which happens most when the game is small in the video, when a facecam, chat or overlay covers the cards, or, for physical play, when the camera films the table at a steep angle or a hand covers the card; an overhead camera works best. Newly revealed cards are added in regular updates, so a brand-new card may show nothing until then. And if a tooltip appears on something that is not a card between games, move the pointer away.
I already use another card-hover extension. Will RiftSight work alongside it?
Yes, both can be installed. Turn on one of them per video or stream, so you see one tooltip per card instead of two.
Which browsers work?
Chrome, Edge or Brave on a computer, for players, streamers and viewers alike. The RiftSight browser extension doesn't run on phones or tablets.
How do I take an OBS screenshot?
See the walkthrough in the Stream path: enter a Rift Atlas Solo Room so a board is visible, then right-click the OBS Preview and choose Save Preview Screenshot.
I declined Chrome's permission prompt.
Switch Watch on again in the popup, or click Turn on for both on RiftSight Settings & Help (it reads "Chrome didn't allow it. Try again."), or click Allow Twitch or Allow YouTube after a Try; Chrome asks once more. Meanwhile Try on this tab works without the prompt, until you reload the tab.
Something looks wrong, or a card isn't showing correctly.
Tell us on Discord: which card, what you expected and what you saw, and roughly when it happened.
What the dot on the RiftSight icon means
For streamers. If you only play or watch, the dot stays gray, and that's normal.
Stuck on a step?
Ask in our Discord: we help players, viewers and streamers get set up.
Get help on Discord